
Kirkland’s Inspired FALL Dollar Tree DIYs | Craft with Me
Kirkland’s has the cutest Fall decor right now, but I have a few tricks to get that same Kirkland’s look for way less money. So, let’s get crafting on the first Fall DIY.
Here for the pumpkin patch sign freebie? Scroll down to the second tutorial, where you can get your free download.

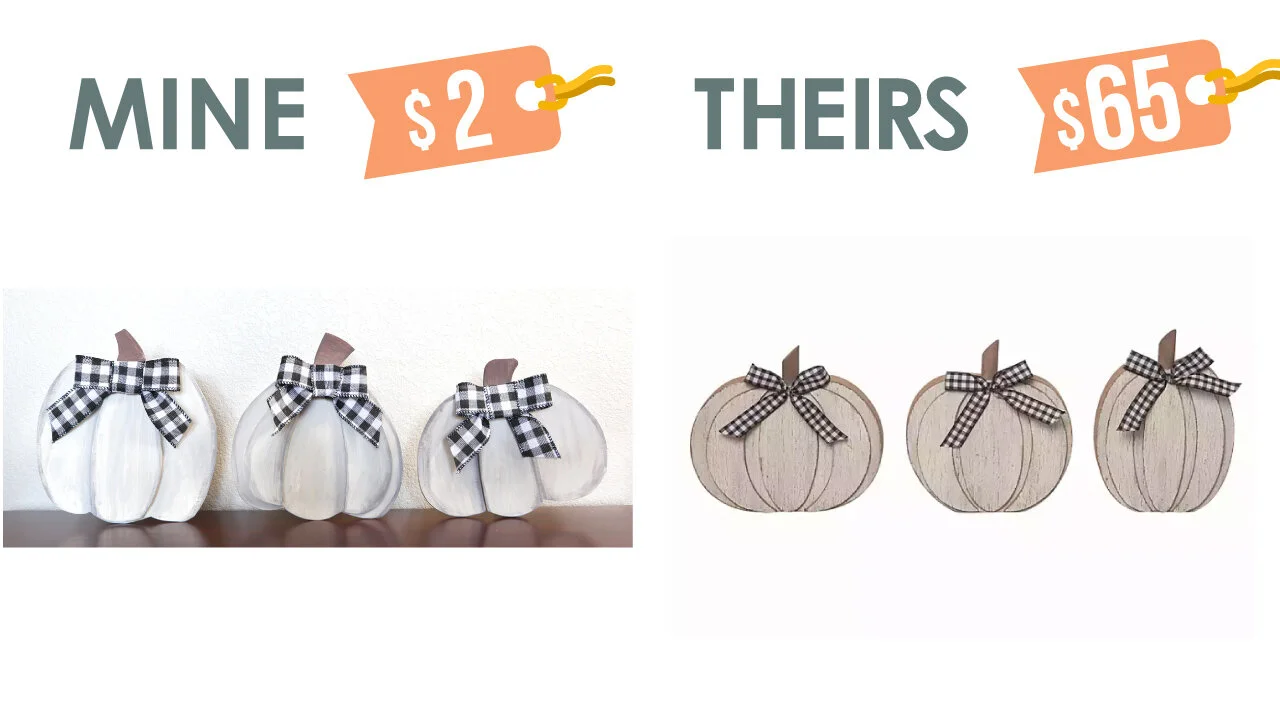
// foam core pumpkins
This set of 3 pumpkins is so cute. I’ve been into neutral Fall decor this season and these will work perfectly. They are $65, but we’re going to make them for way less.

I love a good artistic challenge and if you’ve been following my blog for awhile, you know iI like to use foam core. Foam core is a great medium for seasonal decor because it’s so cheap and if you work with it the right way, it’s easy to get a high end look.
Draw a pumpkin onto your foam core. And cut out two in the same shape. We’ll be using one to create a three dimensional section for the pumpkin.

Always start with a new X-acto blade when working with foam core. If you’re not sure if the slice went through all the way, cut twice while you still have everything lined up. You can always clean up any edges if they look rough.
I want each of the pumpkins a slightly different shape like our inspiration piece, so I did some taller than others.

If your edges came out ragged looking you can always hide that by either filling in with hot glue and then smoothing that out.

Or by using a little masking tape on the side and wrapping it around the back. When you paint the sides, it will be covered up.

I’m going to use some chalk paint on these, because it tends to dry fast and you can get a lot of coverage without too much paint.
When you’re painting on foam core, you want to avoid saturating it with liquid paint because that’s when it will start to bow and peel up on the edges. Be really careful here to use as little paint as possible.
I did a few light coats, going the direction of the curves of the pumpkin.

To make an easel back stand for these, you could either pick up from pre-made ones that just stick to the back.

Or you could make your own out of the leftover foam core.
Start by cutting a triangle about half as tall as your sign.
If you want your pumpkins to sit perfectly straight up, a 90 degrees angle on the triangle is fine.

But if you want the pumpkins to sit back a little, then set up your pumpkin at the angle you want, check to see how much empty space is behind the pumpkin and re-cut that 90 degrees angle. I took about 1/4” off of mine and now the pumpkins will be just a little tilted back.


All that’s left to do is attach the gingham bows.

Here were the supplies we had to pick up. I’m not going to count things you already have in your craft closet, like paint or paintbrushes, but here were the main supplies we picked up from Dollar Tree.

And here is mine compared to the Kirkland’s version. I think they look pretty similar, but let me know in the comments section what you think.

// pumpkin patch sign
This pumpkin patch sign is so sweet with the customized names and gorgeous wood frame. But how can we make this for less than $130, which seems outrageous? Well, with more Dollar Tree finds, of course.

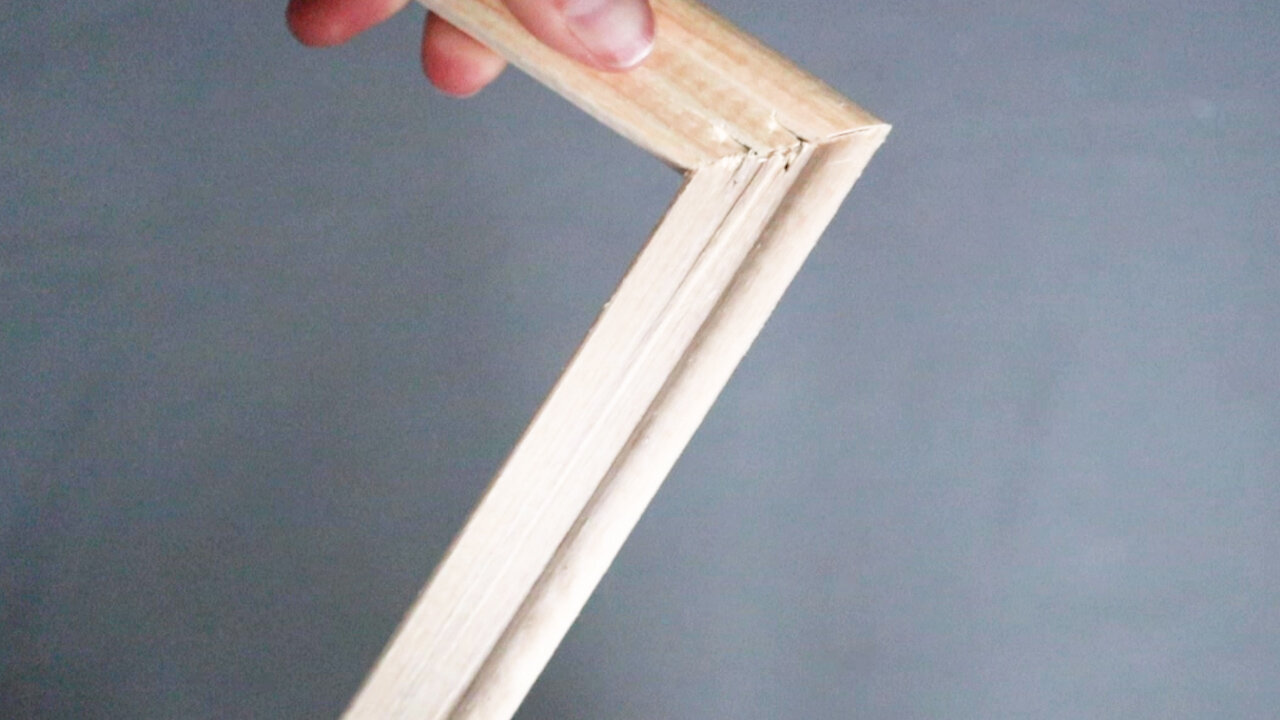
I found this canvas at Dollar Tree. I discovered on another project that these larger canvases have a nice wood frame underneath.
I’m being careful to save this canvas so I can use it on a future project.

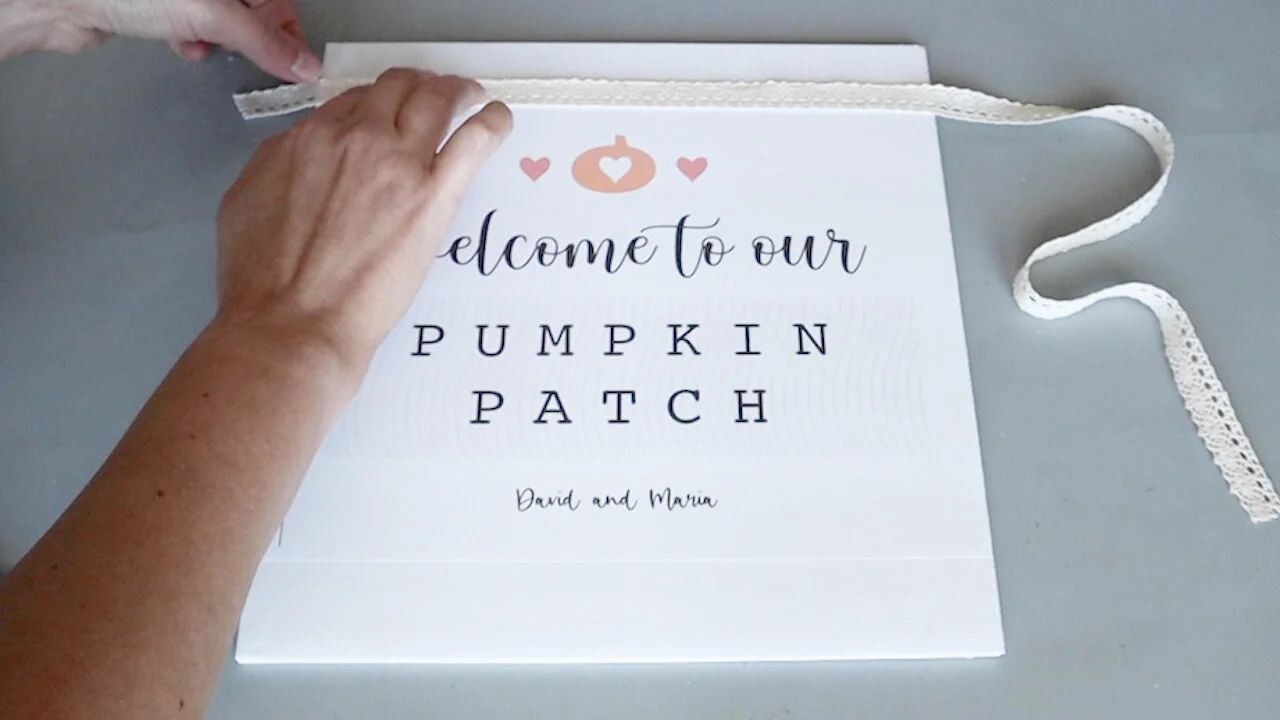
I’m a full time graphic designer, so it was no big thing to re-create this sign. I was able to customize it on my computer and put my own little spin on it, so it wasn’t identical to the Kirkland’s one. You can download the template below. I left the names off at the bottom, so you can write in your own with a calligraphy pen, or use a rub-on transfer to add your names. You can find rub-on transfers at Dollar Tree.


I used a little spray mount to attach this to the foam core. Trim this to be just a little larger than the open area. The foam core backing will make this sign sturdy and will lay nice and flat.

Since my printer only goes up to letter size paper, I have a little edge to cover, so I’m using some ribbon I got at Dollar Tree to blend the raw edge away.
Using a light colored ribbon here will still give this the same look as the Kirkland’s one because it is just a subtle touch of color.
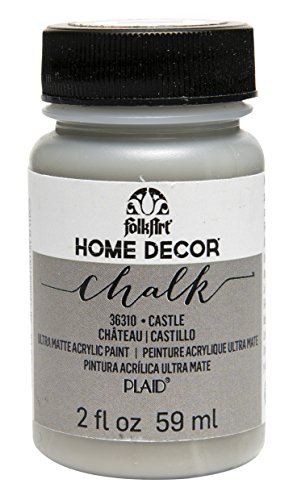
To paint the frame to match the Kirkland’s one, I’m going to start with a greige.

After the greige paint dries, dry brush some black on and go with long straight strokes to try to make it look like wood grain. Go back and forth with the black and greige until you’re happy with the final look.
Don’t forget to paint the inside and outside edges of the frame.

All that’s left to do is glue the frame and the sign together. Since this frame is wood, you can easily screw in a picture frame hanger to the back.

Here were the supplies we had to pick up for this project.

And here is the comparison. I think they came out looking so similar, especially that texture and color on the frame!


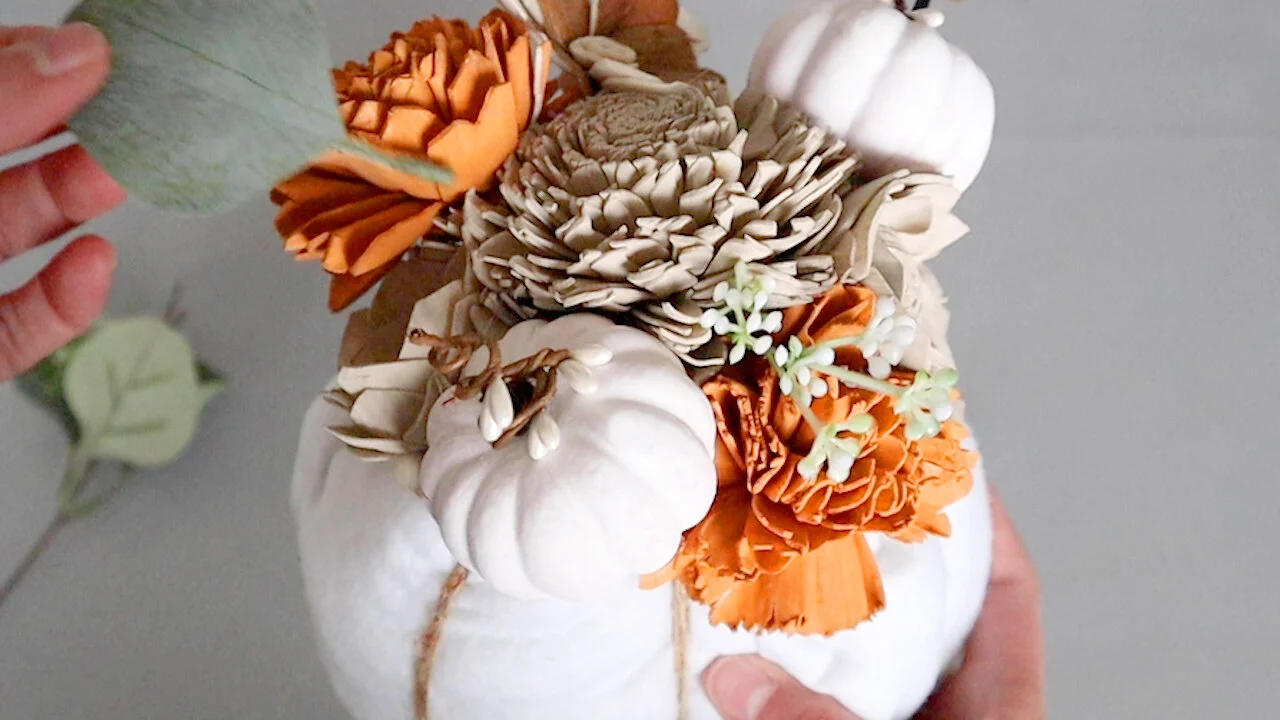
// diy pumpkin flower arrangement
I’ve been wanting to make something like these for awhile. I think they are so festive and fun, with the pumpkin base and fall florals. I’m just going to make one of these today, so let’s say the price is $32 for 1 instead of that $64 for the set of 2.

You can find felt in all different colors at Dollar Tree…fabrics too! I have this white felt and cut out a long rectangle and then folded it in half.
I’m no pro at sewing, so I roughly sewed one of the shorter edges and then pulled it together. This will be the bottom of our pumpkin. One of these days I will get a sewing machine!
Then I stitched up the long side. But don’t pull those stitches together, like we did on the shorter side.

After tying off the edge, you can flip it inside out and place a cube of floral foam in the middle. The square will create a base for the bottom, so this won’t topple over.
I had some old pillow stuffing and used a little of that around the sides, so it looks puffy.
I wrapped some twine around and tied it on the top. Don’t worry about how it looks on the top, because that twine will actually be helping to hold our floral stems in place. The florals will completely cover the top.

I have some Sola wood flowers and I took some bamboo skewers and poked them into the flowers, so they would stick right into the foam.

You could use some flowers from Dollar Tree and instead of poking the skewers in the back, just use a dot of hot glue to connect the flower to the skewer.
I had a few foam pumpkins leftover from another project, so I included those as well.

I was trying to figure out how to add a touch of green and ended up going with these tiny white berries, because they add the touch of color, but aren’t so much that they take away from the rest of the arrangement.
These were the supplies we picked up at Dollar Tree.

This is a huge savings and we could customize it with the florals just the way we wanted.


I hope you enjoyed these Kirkland’s dupes. They were so fun to make!


FTC: Not Sponsored. All opinions are always 100% honest and my own. Some links may be affiliate links. If you click a link and buy something, I receive a small commission for the sale. It doesn’t cost you anything extra and you are free to use the link or not as you choose. If you do use my links, I appreciate your support.
How about some Target Dollar Spot crafts and Dollar Tree coastal transformations. We’ll be putting together tiered tray miniatures to decorate our little coastal vignette.