
EASY To Make Spring DIY Decor | Kirkland's Inspired
It’s been awhile since I’ve done any dupes and I know you guys love these low-cost versions of high end home decor, so let’s get crafting with the first Spring Kirkland’s dupe.
Oh, and here’s a video if you want to follow along with the tutorials!

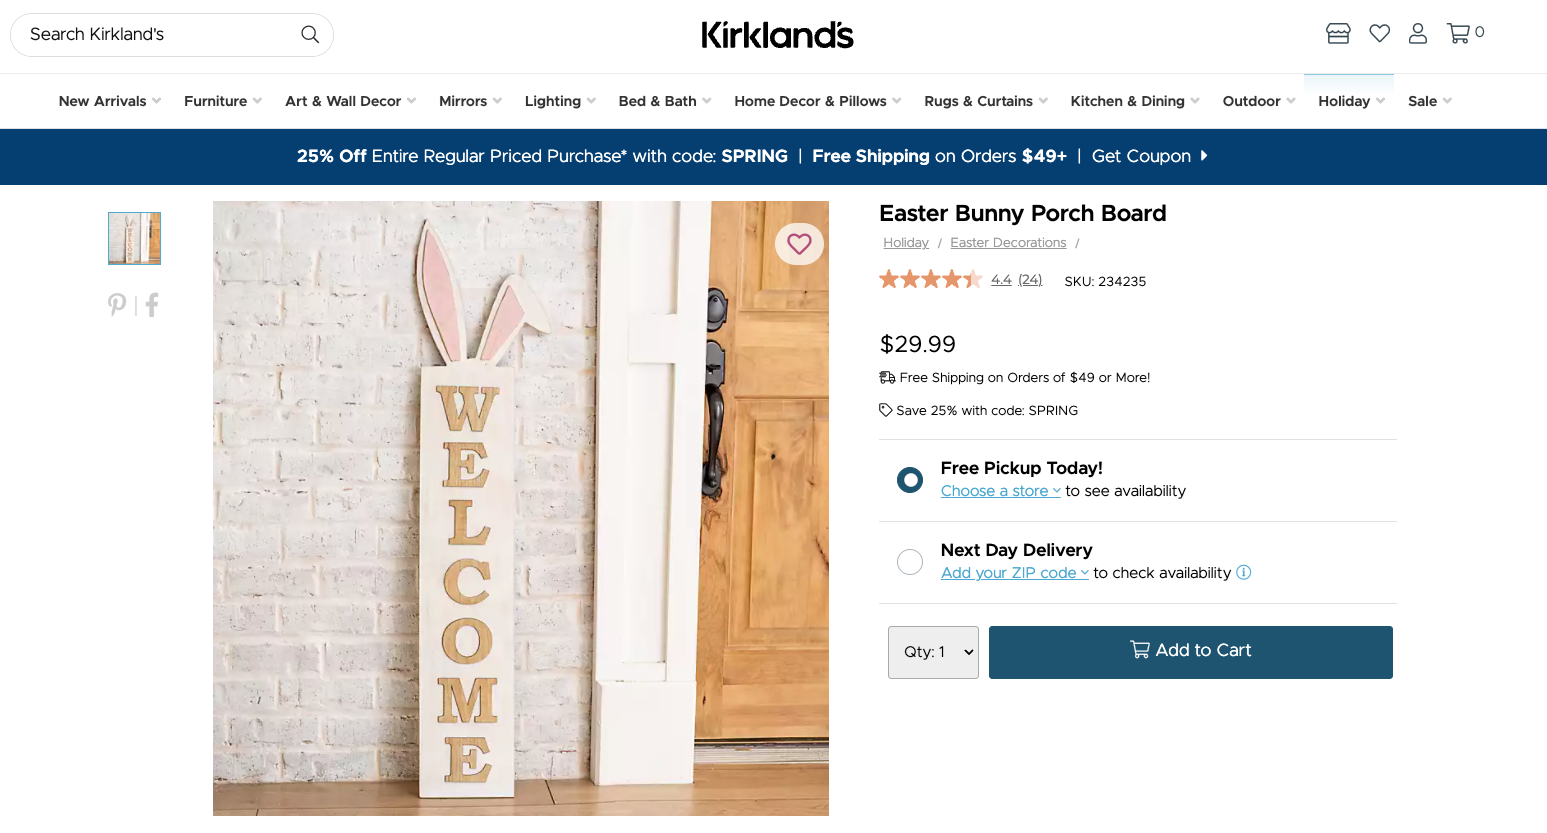
// bunny sign
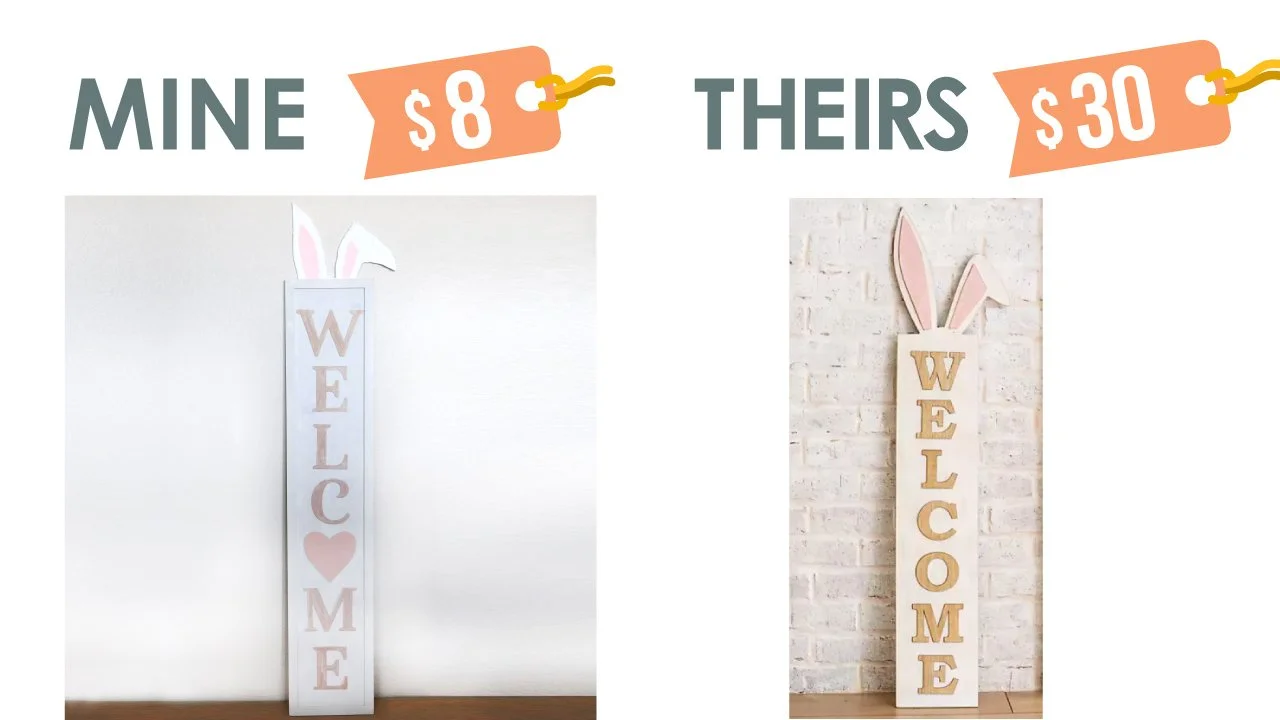
Isn’t this welcome sign the cutest? I love the bunny ears on top and let me show you what I found at Dollar Tree to help us make this for a lot less than $30.
I found this large sign for $5 at Dollar Tree and it is quite sturdy and about 4 feet tall. But since Valentine’s day is over, let’s give it a makeover.
I’m not a fan of this red glitter (or any glitter for that matter!), so a little sanding and vacuuming will help us out.


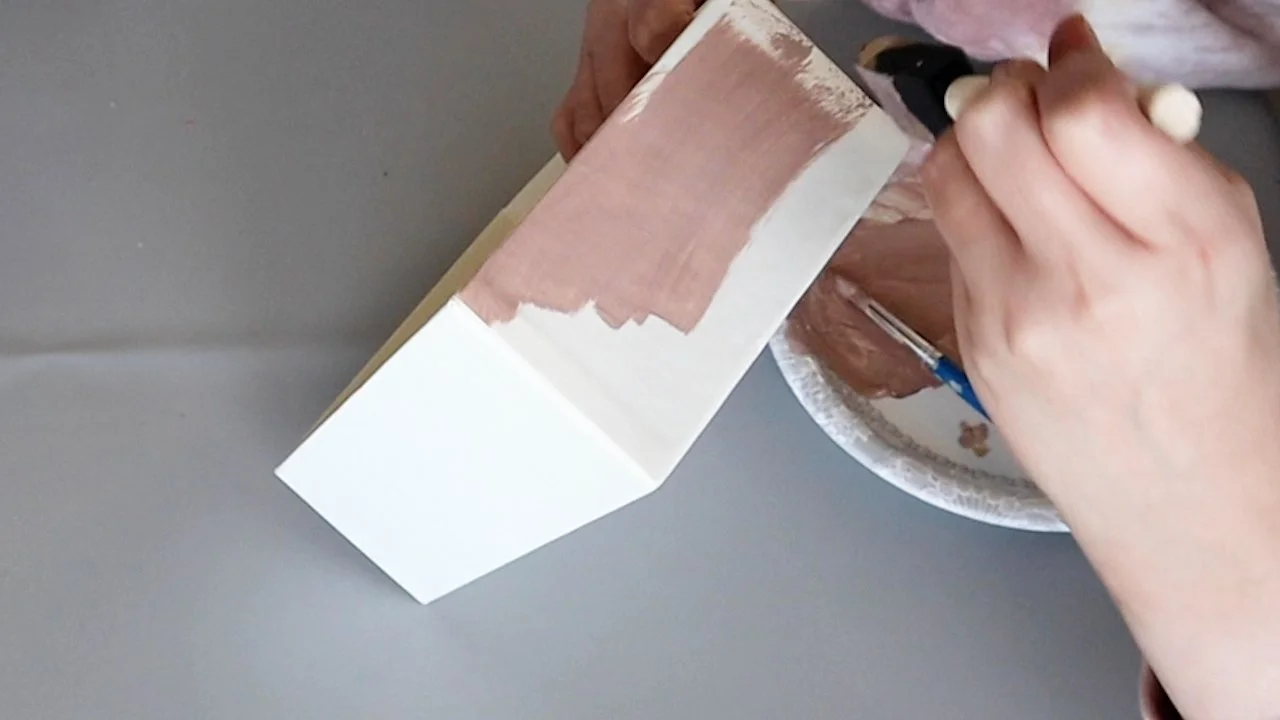
The letters and heart are raised so I’m going to spray paint the whole thing and then go in and paint the letters and heart.

Next we’re going to work on the bunny ears. I picked up foam core from Dollar Tree. They also have white foam core, but all I had on hand was black the day I was making this, so it will have to do. I freehanded the bunny ears and then trimmed them out with an X-acto knife.


You can find this microfiber cloth at Dollar Tree. I’m also going to cut some pink fabric for the middle of the ears. I’m going to glue this onto the foam core ears. And then just attach that with hot glue to the back of the 4 foot tall sign.
Here were the supplies we needed to pick up for this project.

And here is mine next to the Kirkland’s version. What do you guys think of this one? Pretty close, right?
// easter egg centerpiece
I thought this centerpiece was so simple and elegant. I really like the look of the box and the soft pastel colors. But $70 is a lot for florals in a box, so let’s see how much cheaper we can make this ourselves.

I started with this sturdy cardboard box that was packaging for some hand soaps. I like how this box has a linen type texture on it too. We’ll use a light brown paint to match the Kirkland’s inspiration piece.
I used floral wire to cut my floral foam. It’s not perfect but close enough. We’ll be covering all this up with moss anyway. You can find this green moss at Dollar Tree.
With the size of the candles I’m using and my box was a little shorter, I’m going to use only 2 candles instead of the 3 like the one from Kirkland’s. I have a lot of greenery here and placed the candles first so I would know how much space I have around the edge.


After I was happy with the florals, I added some pastel eggs around the edge to add a little color to our centerpiece.
If you feel the box looks a little bare, you could add a ribbon to the top of bottom to give it something extra. I’m trying to get mine as close as possible to the Kirkland’s one though, so I’m going to leave that ribbon off.

Here were the supplies we needed to pick up.

And here is mine next to the Kirkland’s one. What a great savings for a very similar look!

// easter sign
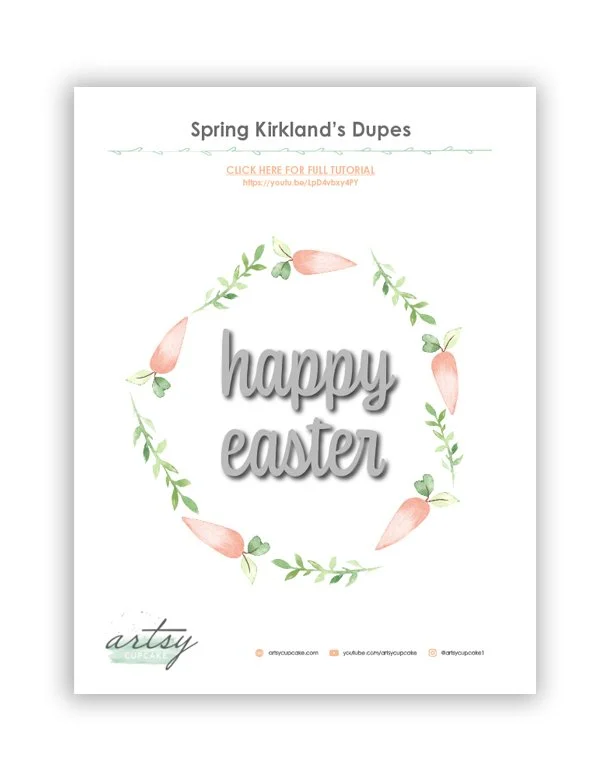
I thought this Easter sign was so sweet and the soft colors go with all our spring decor today. Now, I don’t have a Cricut, so let’s figure out a way to make this sign and all the lettering without a Cricut and for a lot less than $20.

I had picked up this wooden sign from Target a few months ago and have used it for a couple different projects already. I’m always upcycling my old supplies because I don’t like anything to go to waste. The edges are a little rough, but don’t worry, we’ll fix that in a minute.
I measured it to see how big I need to make the “Happy Easter” sign.

I created this sign in Adobe Illustrator, so I have the printable here for you in case you want to make this for yourself.
I trimmed out our design and then used spray mount to attach it to our wood sign. Then trim out those extra carrots. I thought it would be nice to add some dimension to our sign and we’ll use a piece of foam tape on the backs of the extra carrots, so they are raised up from the rest of the sign just a bit.

Now we want to conceal the edge of the paper. There are a lot of different ways you could do this – twine, rope, florals, ribbon. I think I will use some greenery to match the green stems we have on the sign, but first I used some Dollar Tree rope to hide the rough edge of the sign.
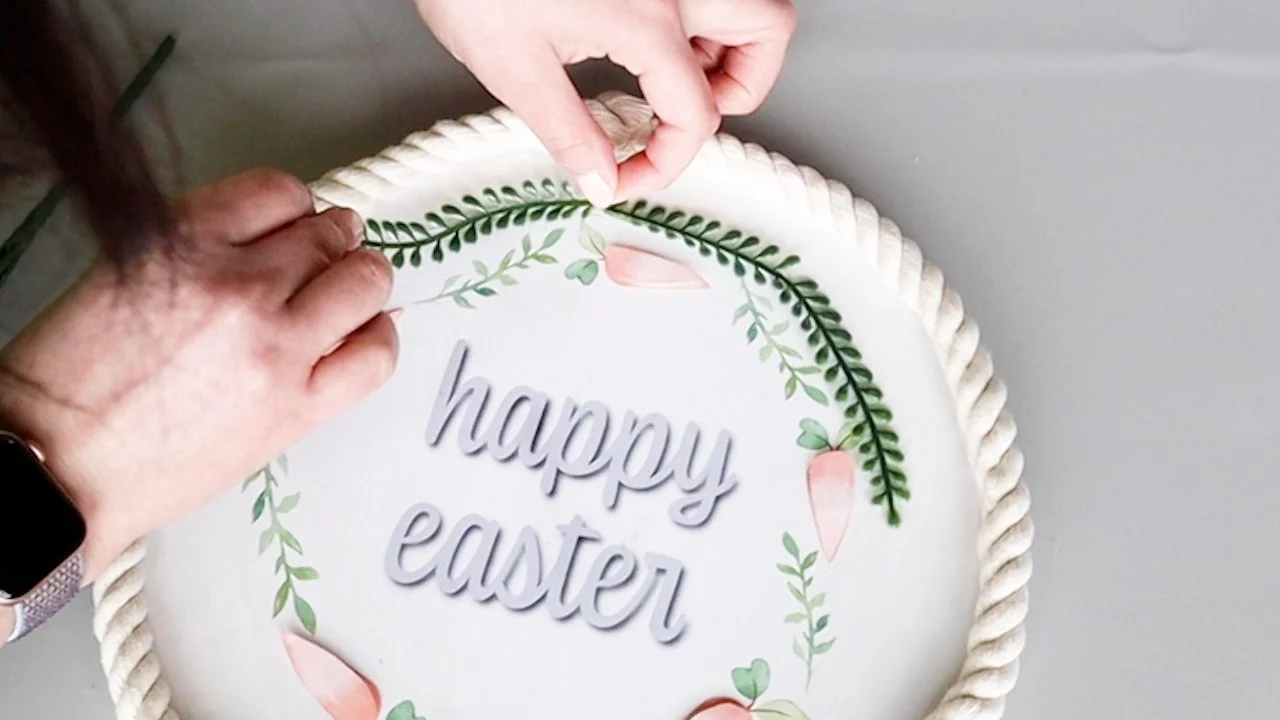
After we glue our bow to the back, the finishing touch is to conceal where the rope meets in the middle.


Here were the supplies we used.

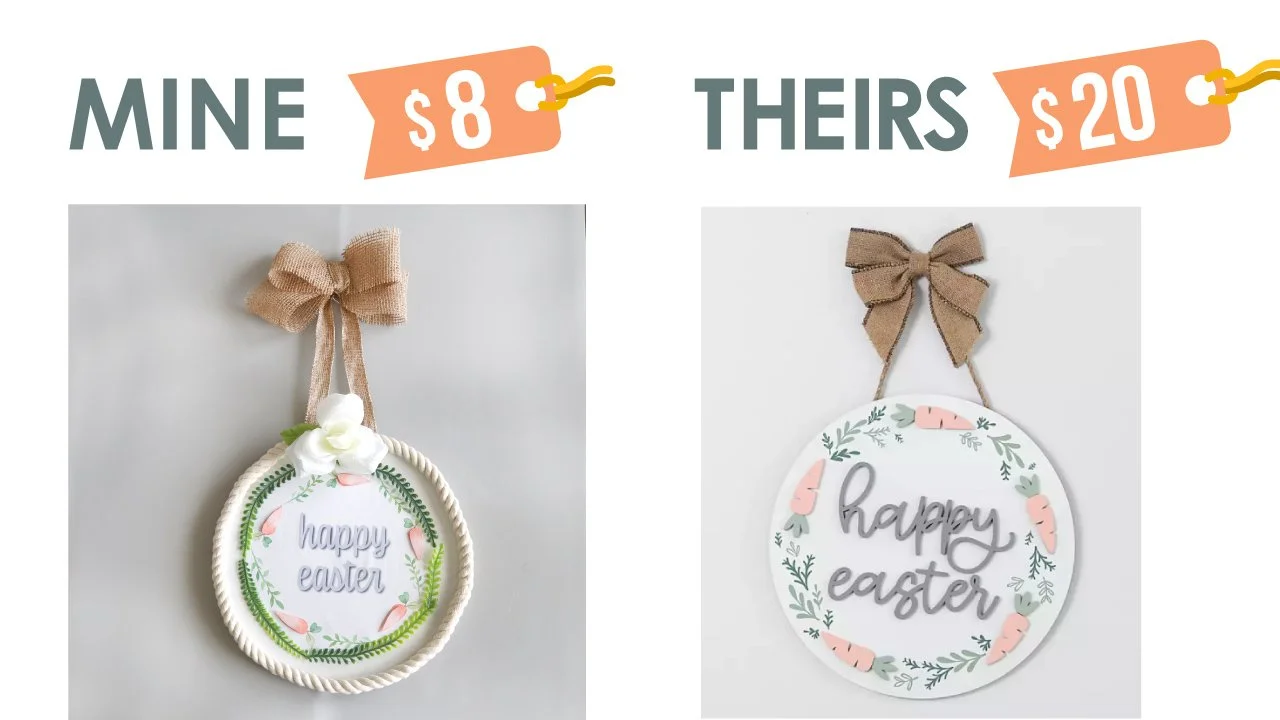
Here is mine next to the Kirkland’s version. I love how mine came out with a few extra details, but just as pretty!
If you got a few ideas from my post today, I would love to hear from you in the comments section below. Thank you so much for reading and watching my tutorial and I hope you have a very creative day!


FTC: Not Sponsored. All opinions are always 100% honest and my own. Some links may be affiliate links. If you click a link and buy something, I receive a small commission for the sale. It doesn’t cost you anything extra and you are free to use the link or not as you choose. If you do use my links, I appreciate your support.
How about some Target Dollar Spot crafts and Dollar Tree coastal transformations. We’ll be putting together tiered tray miniatures to decorate our little coastal vignette.