
White WINTER Dollar Tree DIYs | How to decorate after Christmas is over
If you’re wondering how to decorate after Christmas is over, then you’ll love these white Winter Dollar Tree DIYs. These DIYs are perfect for after Christmas decorating ideas but they’re also pretty neutral Christmas decorations that you can start enjoying right now during the holiday season.
I’ve got 1 thrifted item, 1 upcycled item and a DIY with new items, so come craft with me to get ready for after Christmas decorating!

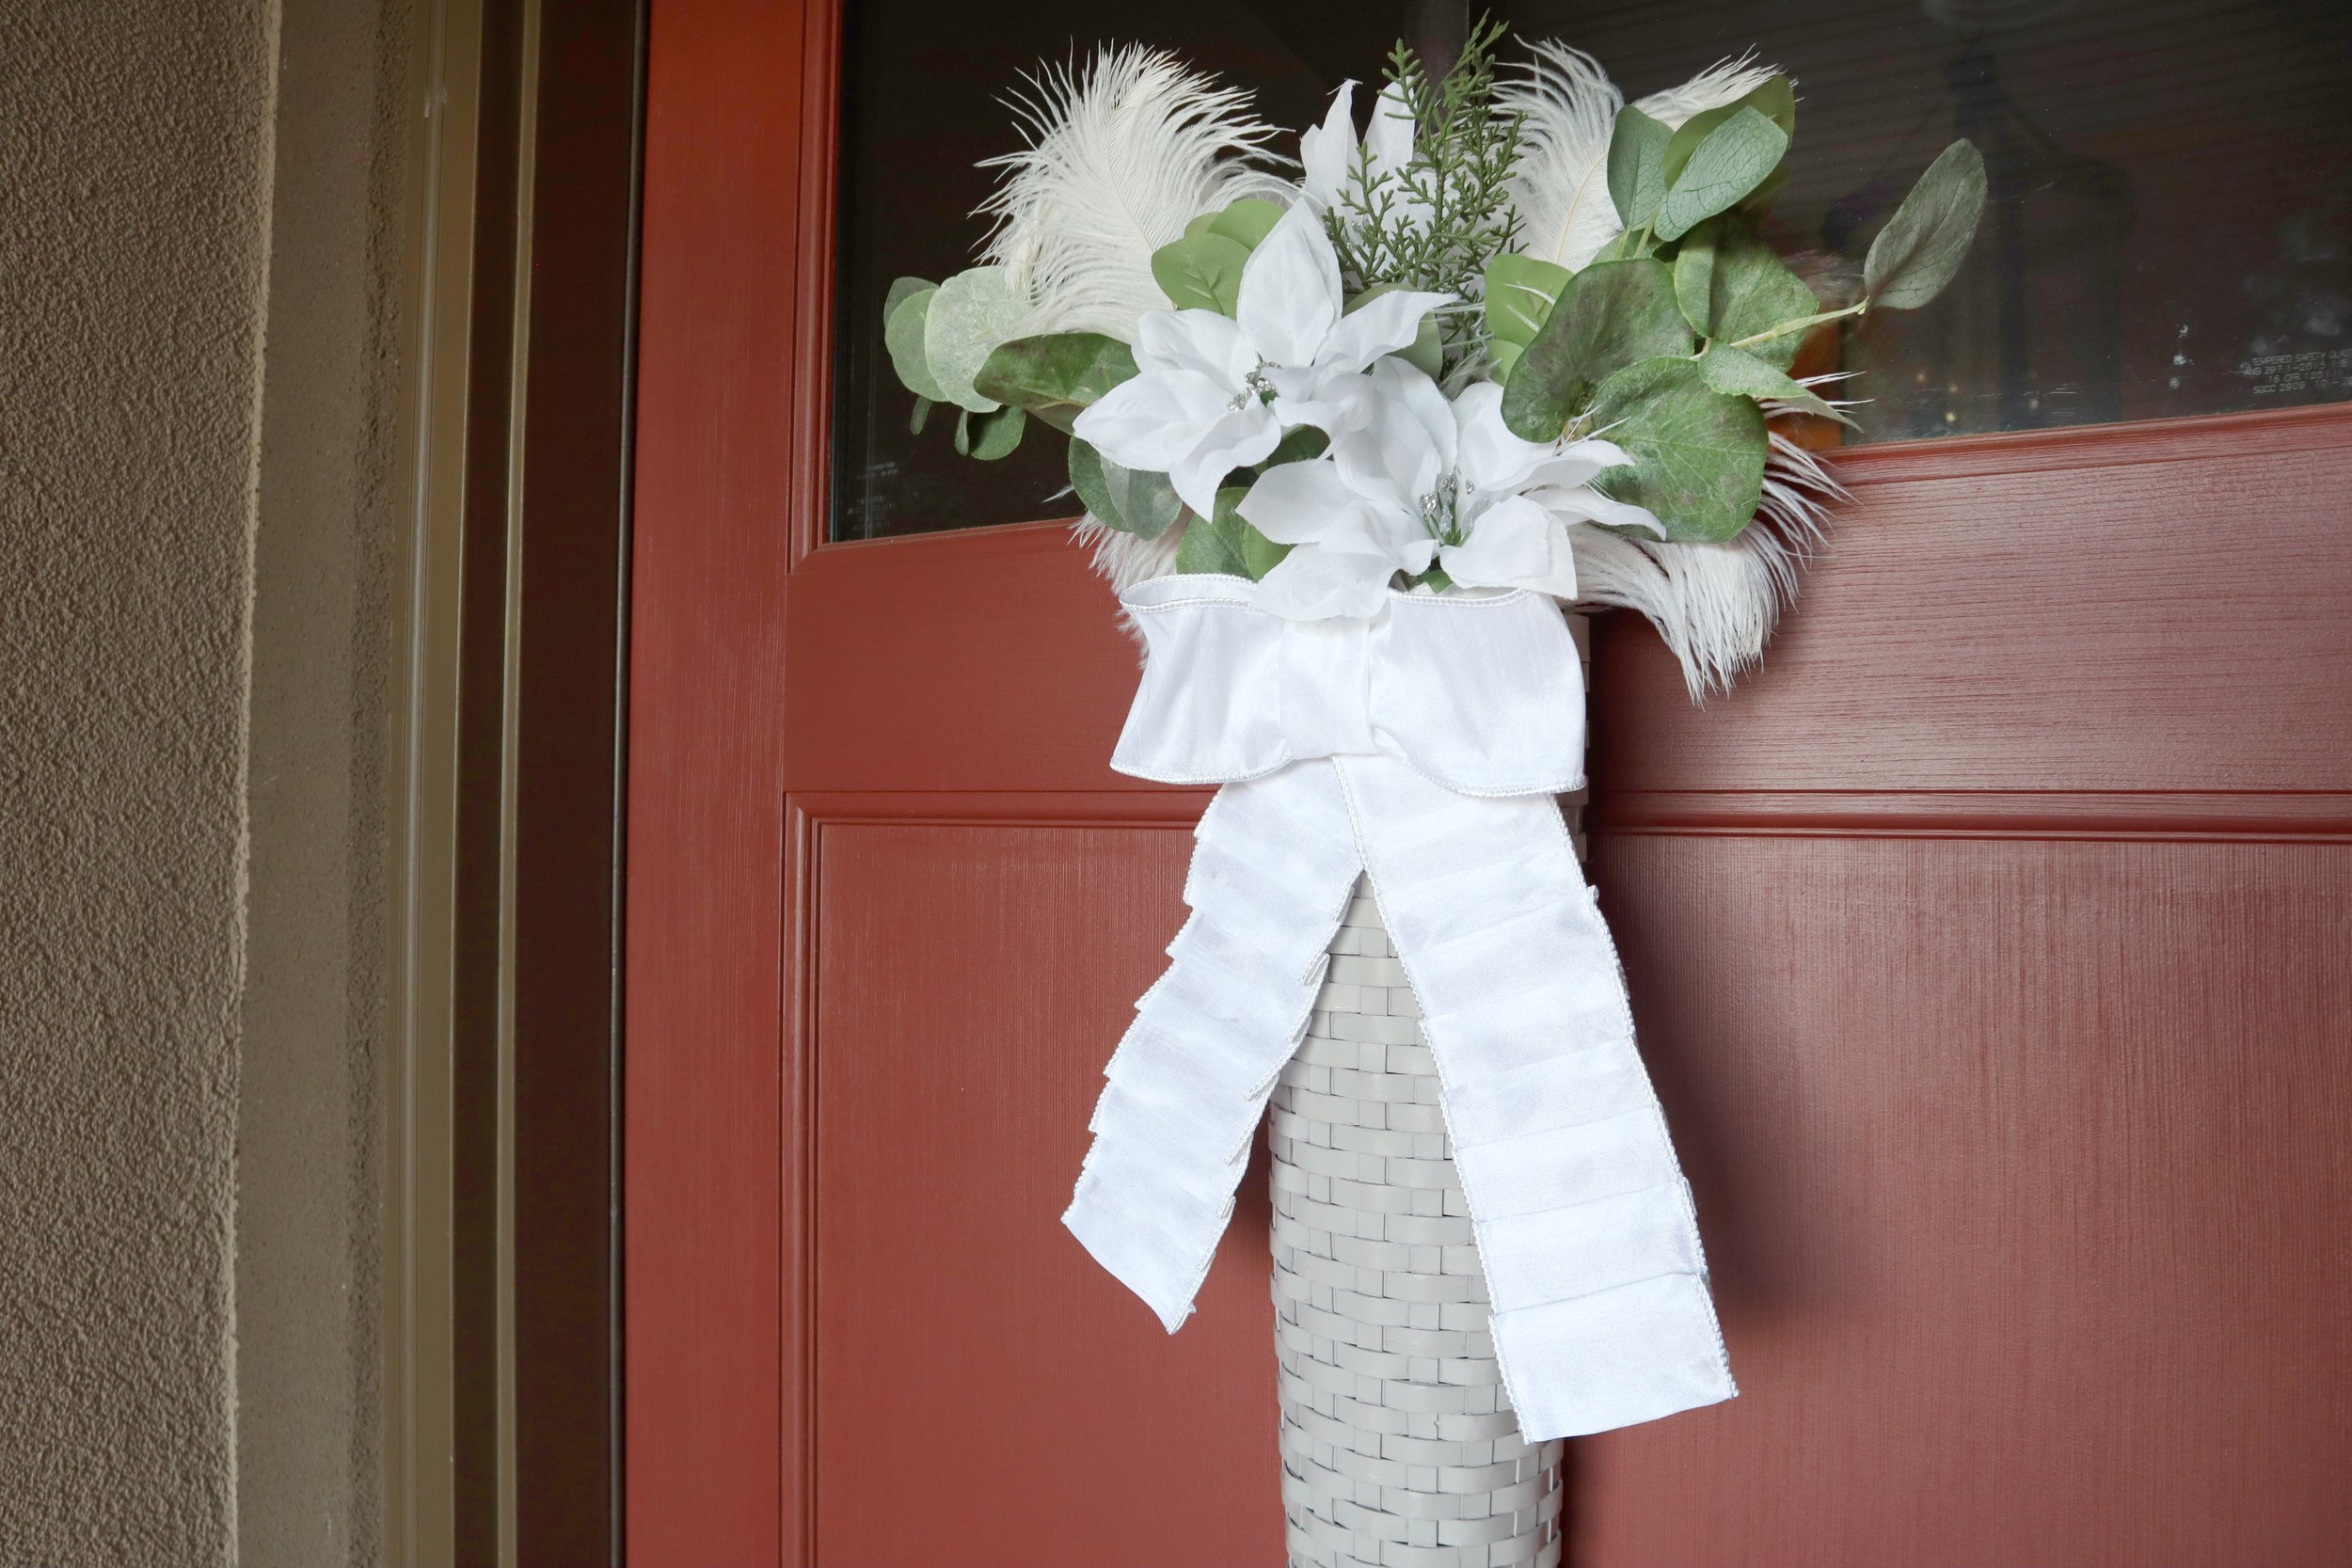
// thrifted feather basket
I went to my local thrift store and they had all their Christmas decor out. I found this kind of awkward looking basket. It’s just super tall and skinny and it had a random black feather inside. It was only $3 and I thought I could turn this into something really beautiful.
If you can’t find a basket exactly like this one, any shape will do, just make sure at least one side is somewhat flat, so you can use that as the back and it will lay flat against the wall or door when you hang it.
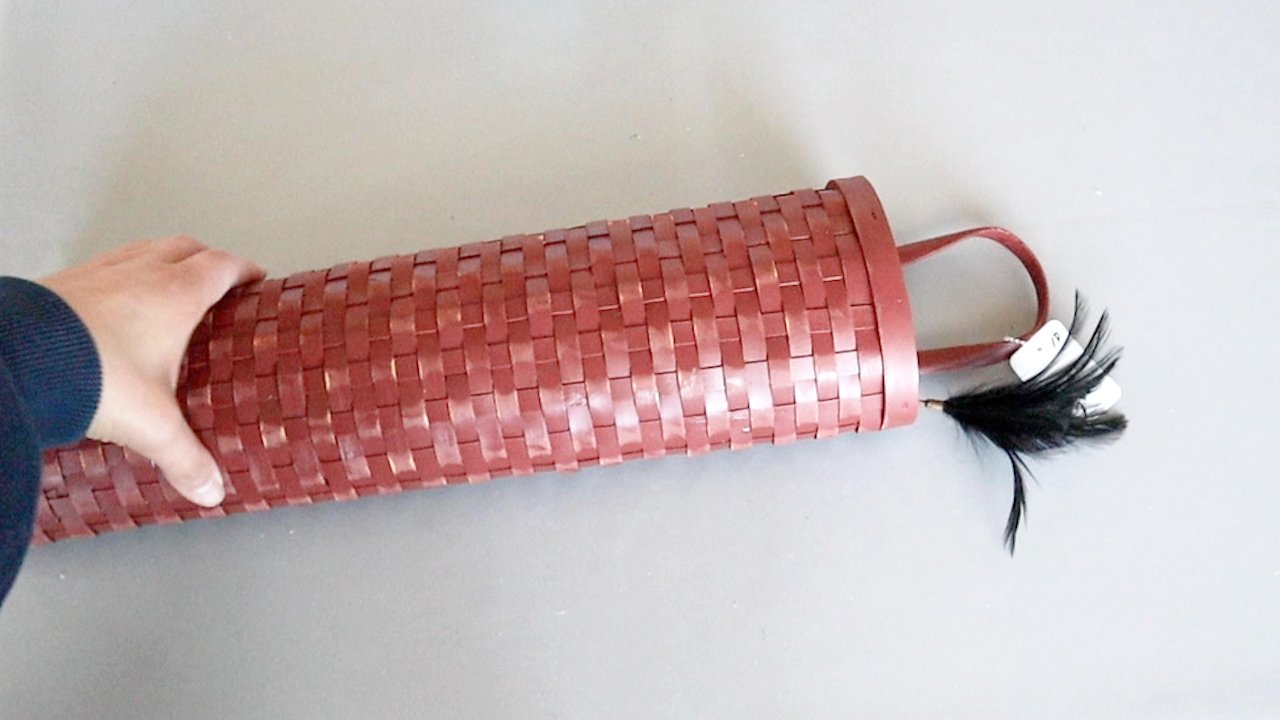
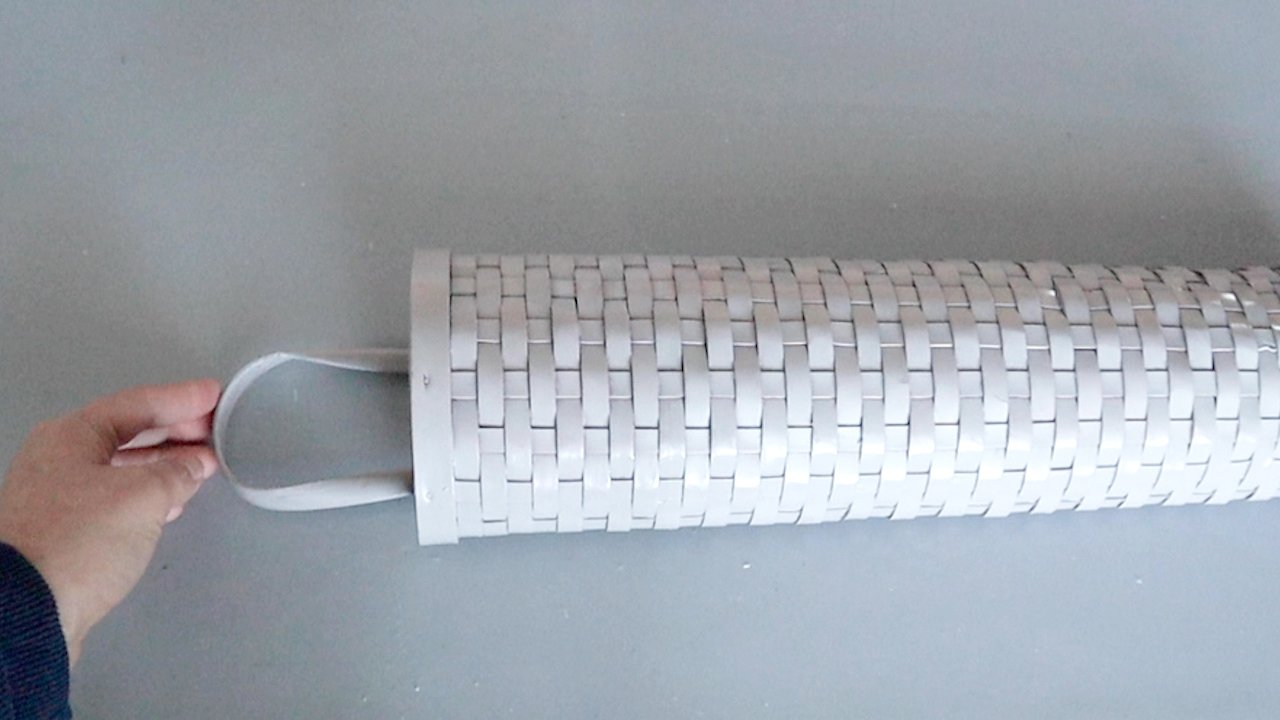
That random black feather inspired me because I had these feathers that I picked up on Amazon and I think they would look really nice in a floral arrangement. I think I’ll paint the basket a light grey, kind of like the color of my craft mat, because it will provide a nice contrast, but still be a neutral color palette.


This plastic basket really took the spray paint easily and I think it looks so pretty.


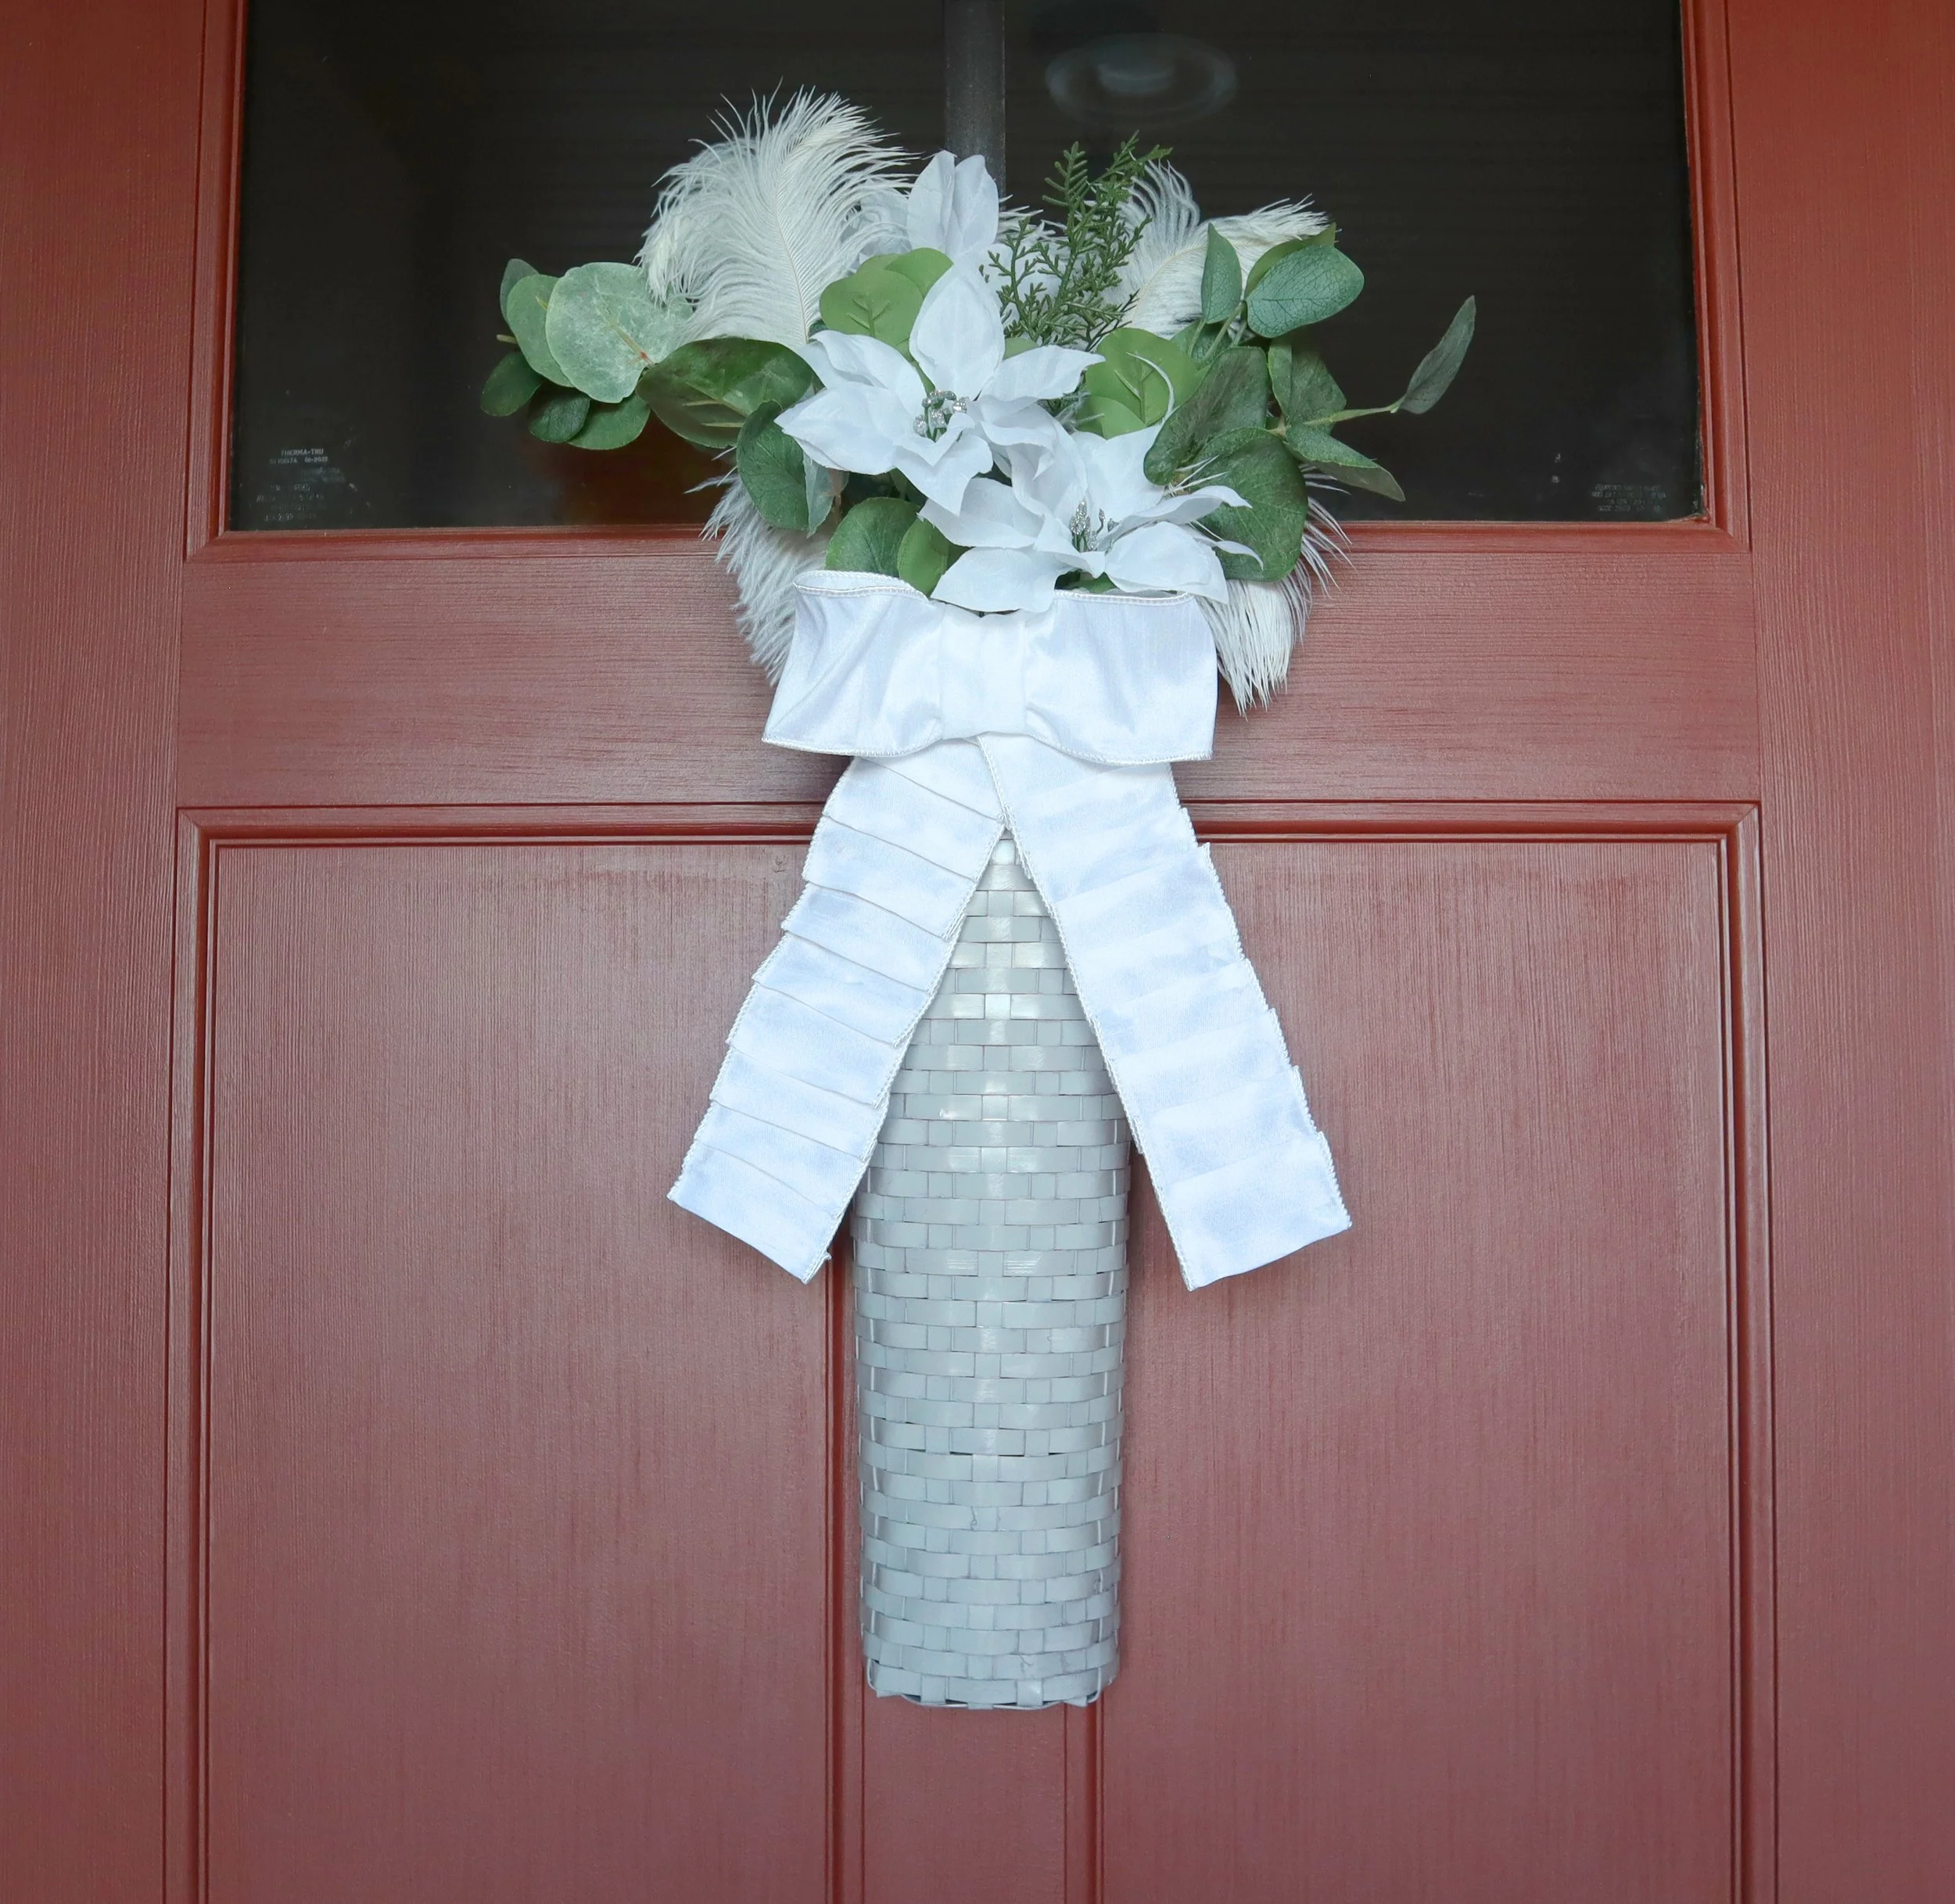
Let’s work on the floral arrangement now. I’m going to use some eucalyptus leaves and white poinsettias along with those feathers. I will try to fan this out a bit, so it creates some weight at the top and looks more balanced.

I slid the florals into the basket. I’m not using any glue here because I do want the option to change out the florals for different seasons.

You could leave it just like this, but let’s dress it up a bit more by adding a bow.
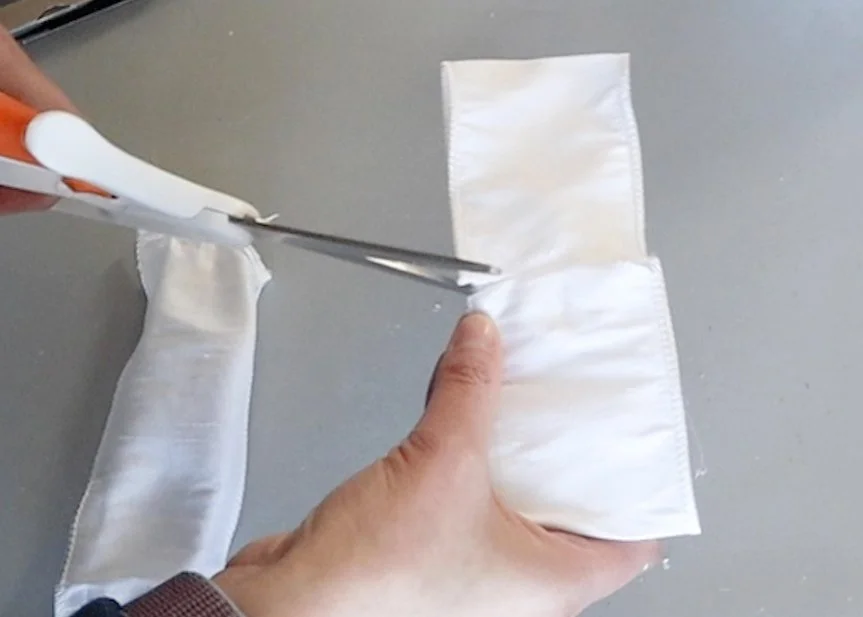
I’m just looping a piece of wired ribbon and glueing it on the back.

Then I cut 2 little notches in the center.
I wrapped a bit of wire around the middle. Then I wrapped a piece of ribbon around the center and glued it in place on the back.


I took the same ribbon and pleated it by folding it back and forth. I wanted the top to be tapered a bit, so I folded the top corners in. Then I attached the bow to the tails.

Here is the final look.
// upcycled box
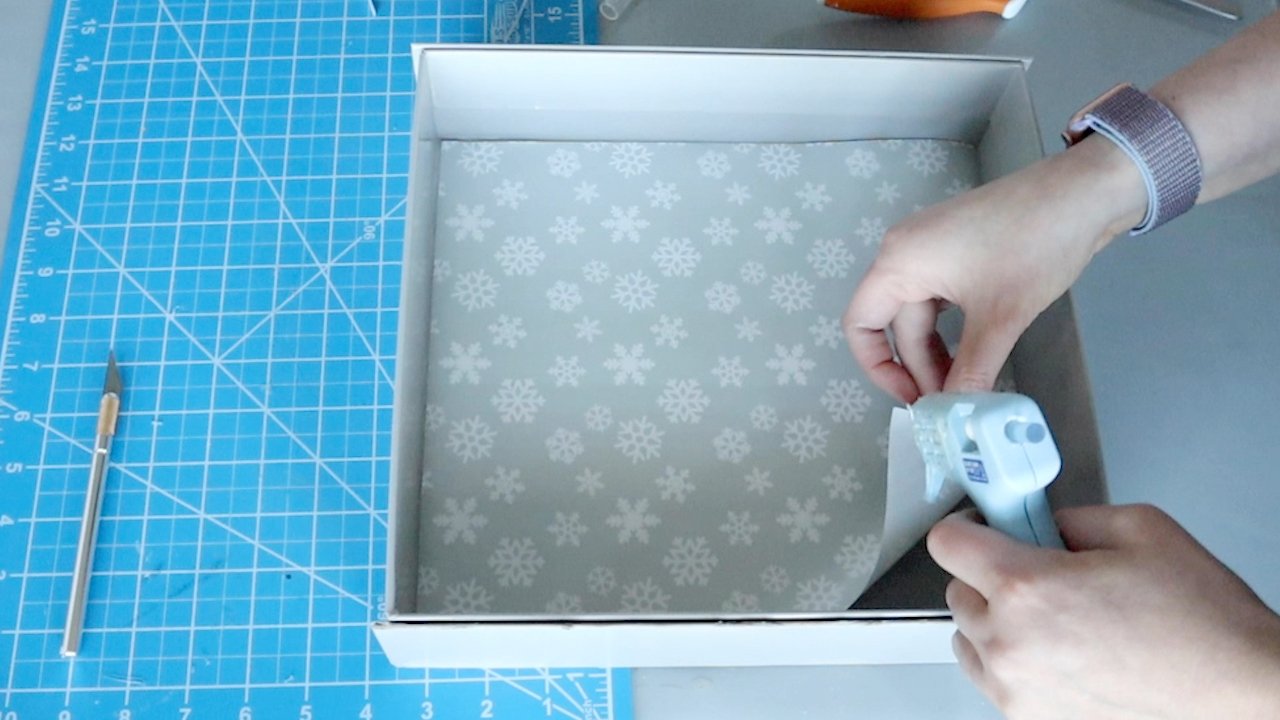
For our next Winter craft, we’ll use this box. You may be getting a lot of these types of boxes during the holidays, so save the good ones for making new home decor.
We’ll start by cutting off the flap so we have just the open box with no lid.

I gave box a coat of that same grey spray paint that we used on the basket.
I spray painted all the sides on the inside and the outside. For inside bottom area, we’ll be using some wrapping paper that I found at Dollar Tree.

You could also go with contact paper for this part. My Dollar Tree always carries this light grey contact paper and it’s very elegant and beautiful for crafting home decor, so I try to always have it on hand.

I trimmed out my wrapping paper and if you have the contact paper, it has that self sticking back, or you could use spray mount with just a regular wrapping paper. Or you could do what I’m doing here, which is attaching the corners with hot glue.
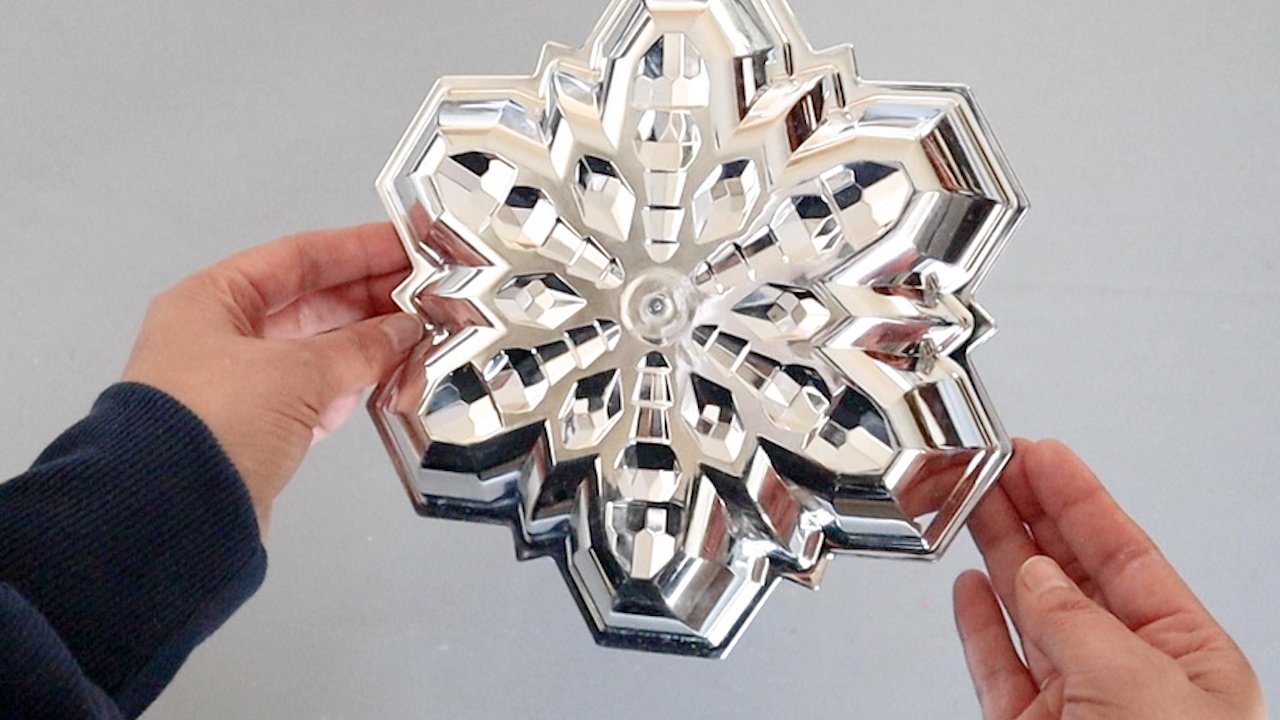
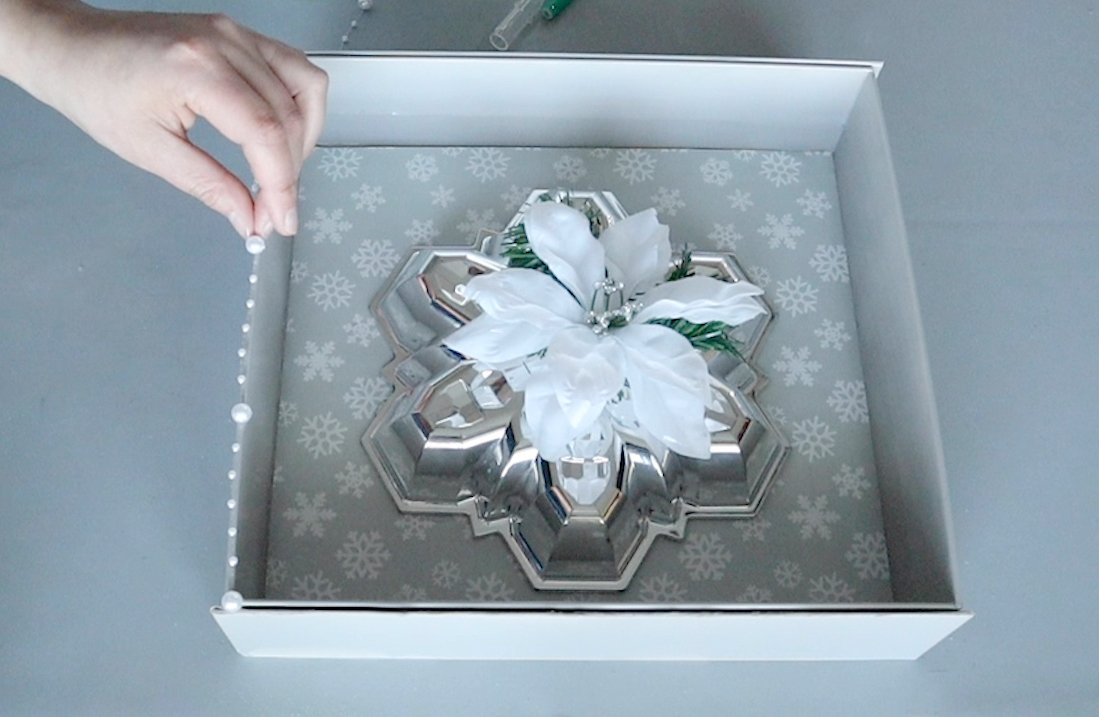
I found this plastic serving dish at Dollar Tree. Even though it’s plastic, it isn’t flimsy at all. It’s really solid and the light blue on the inside is gorgeous and sparkly.
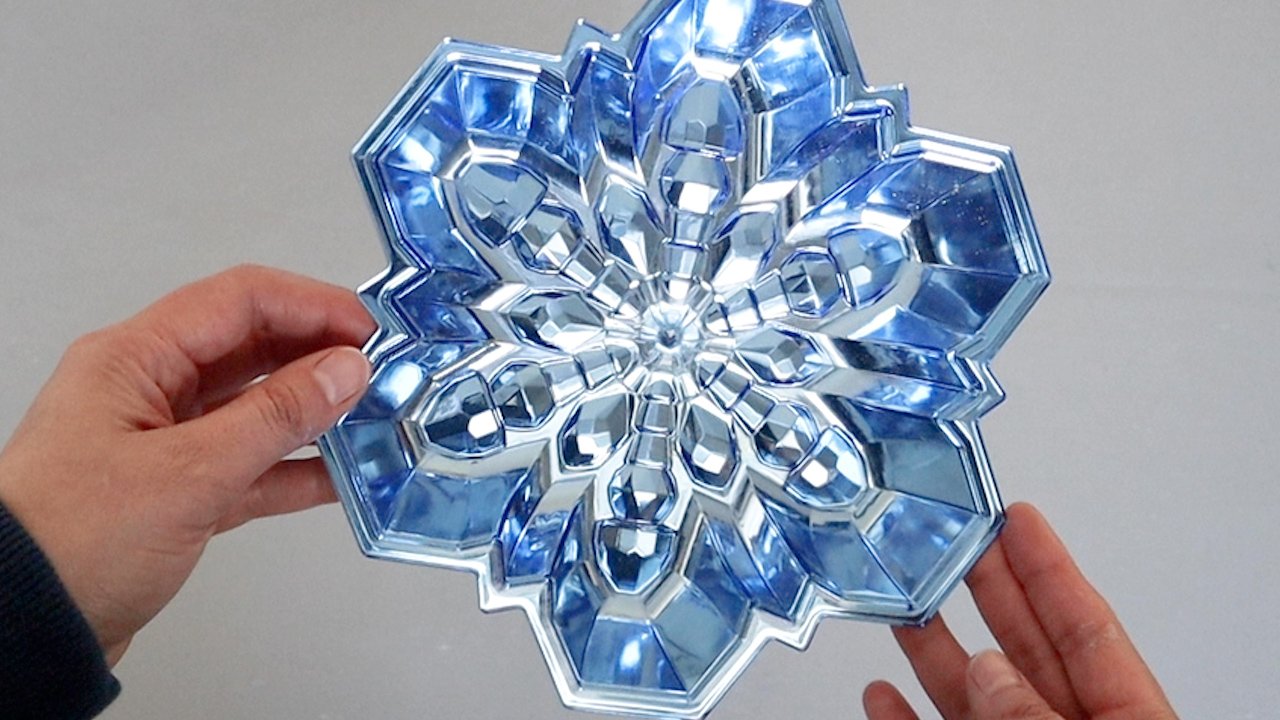
But the outside is just as pretty with a shiny silver color. I think I’ll use the silver side because it will go well with our neutral color theme today.
It needs a little something. Maybe a poinsettia? The poinsettia looked a tad lonely so I added a bit of greenery too.

After attaching the snowflake to the inside of the box, I added some of my pearl beading, which I’ve been using on a lot of projects lately. This took a little patience to glue to the edges, since the edges on my box are so thin. But I think it added a nice finishing touch, so it was worth the trouble.

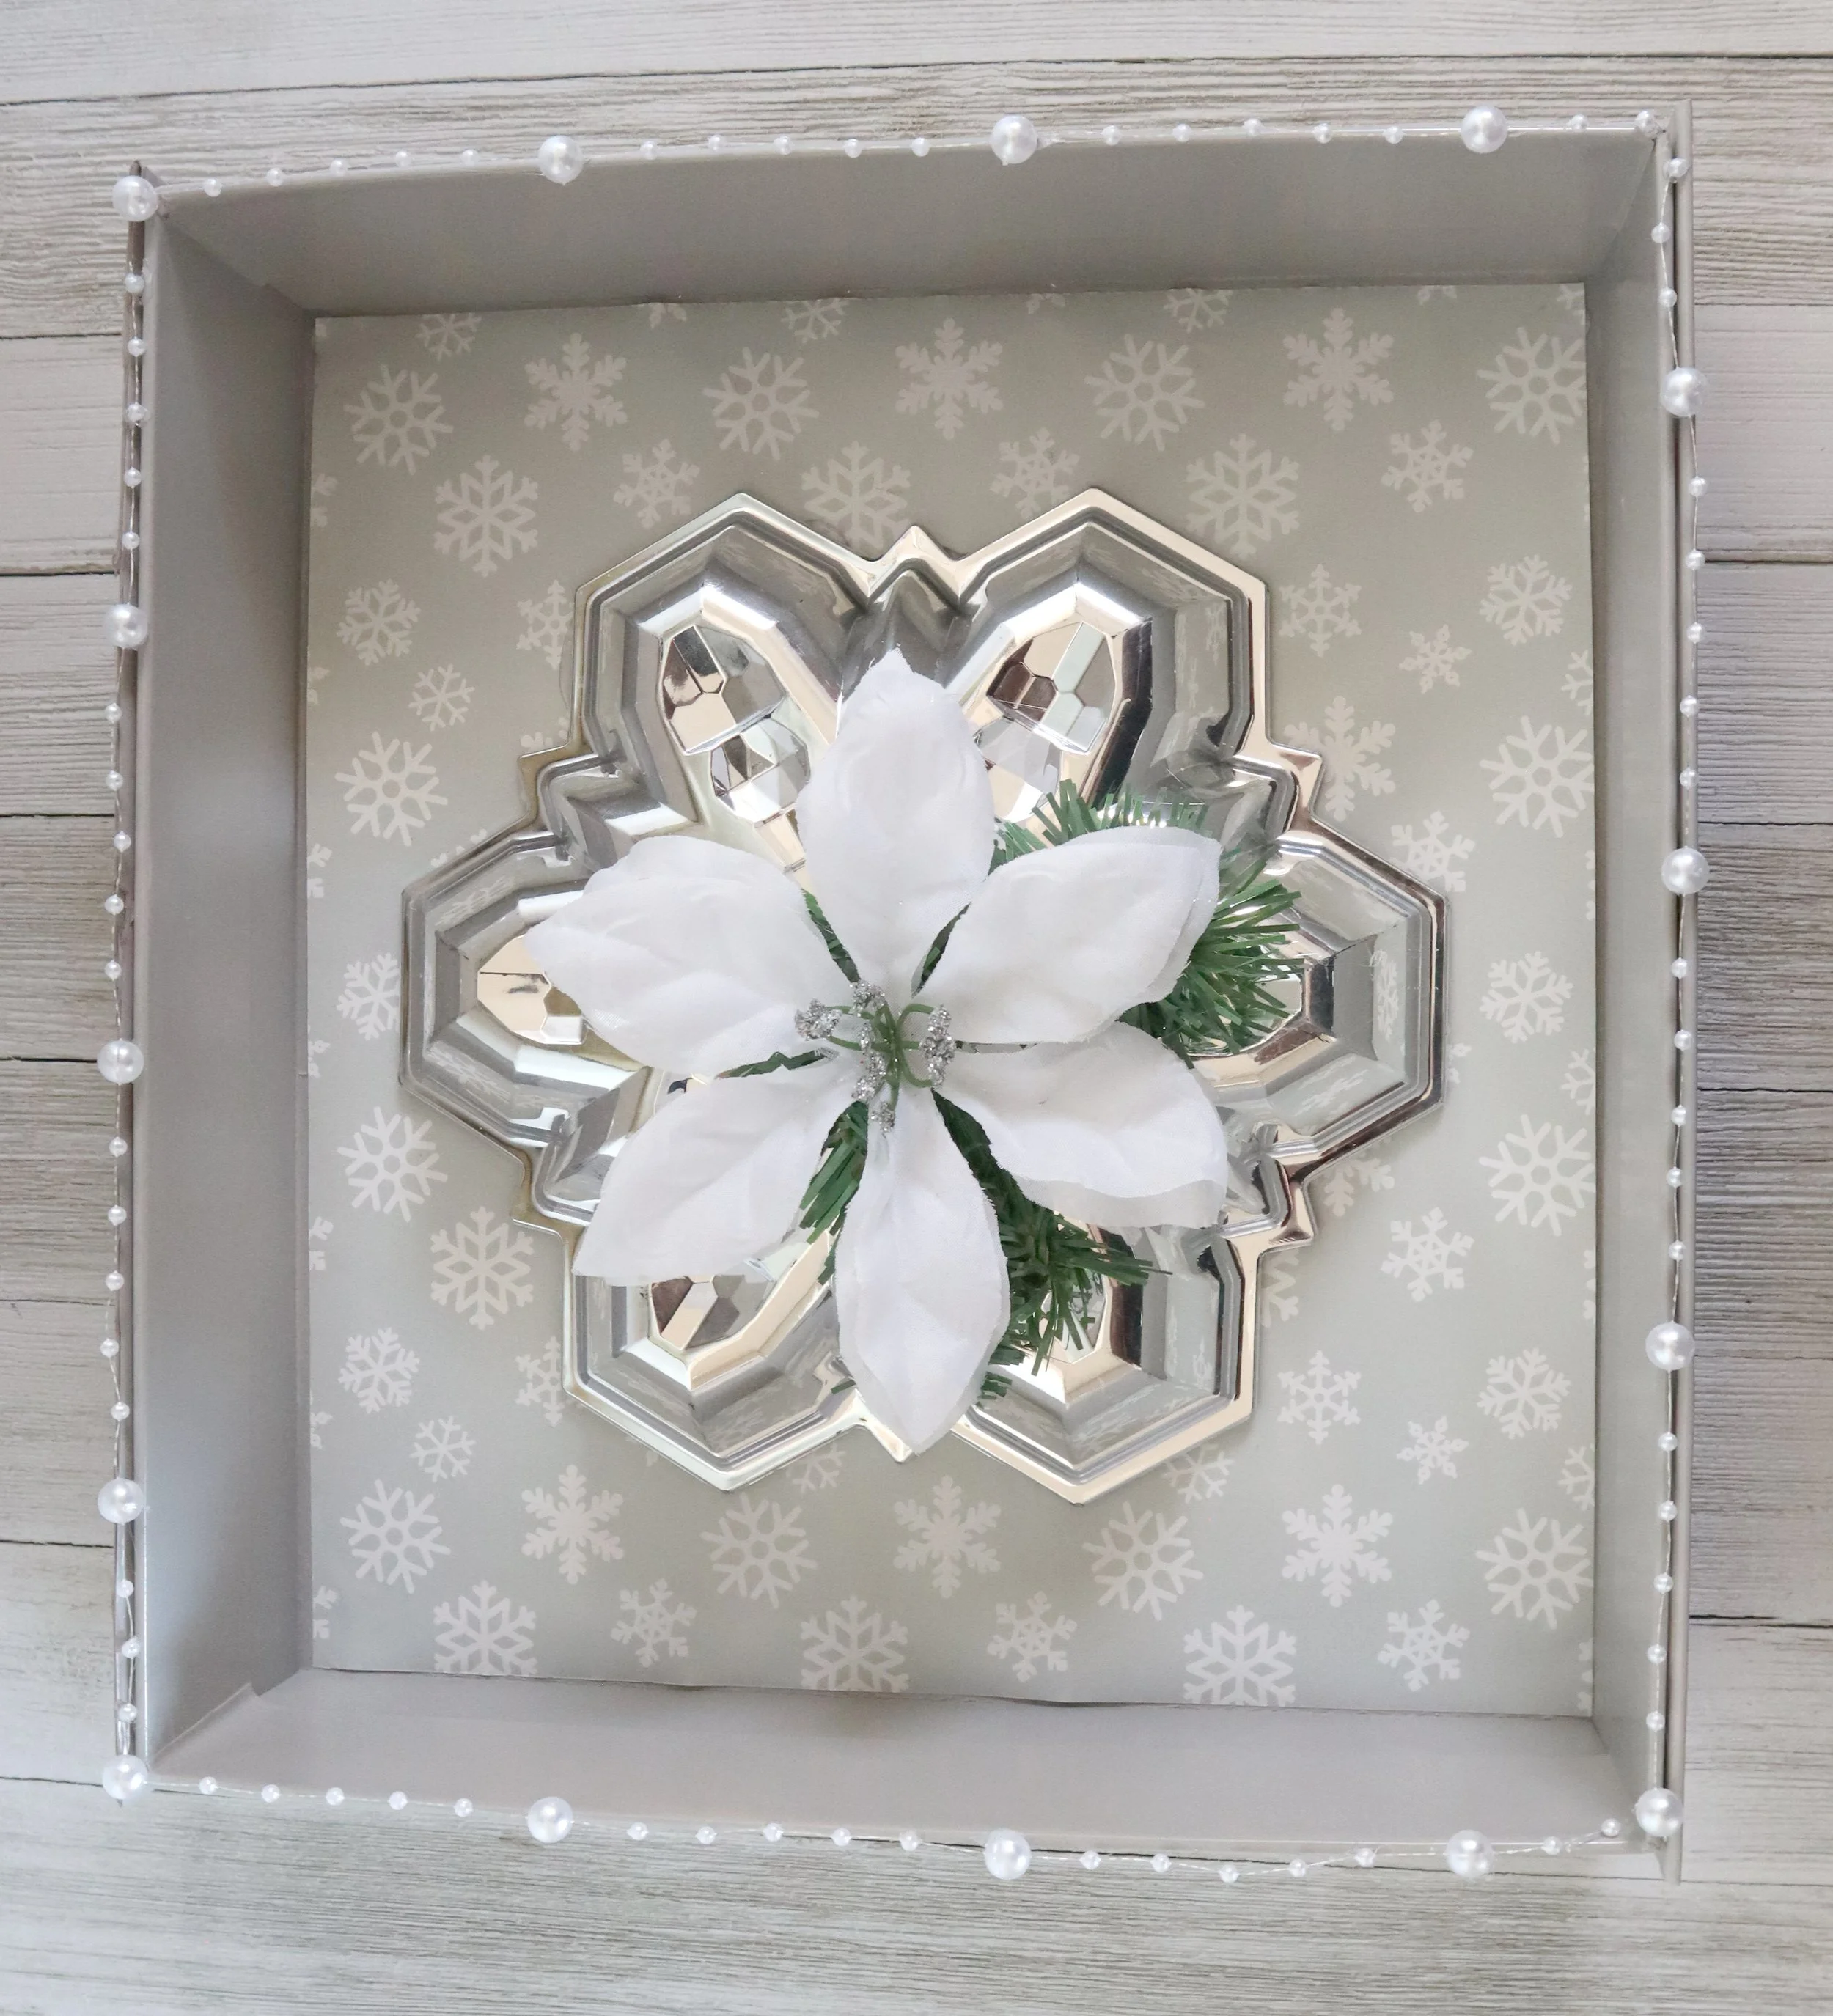
And here is the final sign! I think this would look good hanging on the wall or leaned up with other decor on a shelf. Super elegant and pretty!
// pom pom wreath
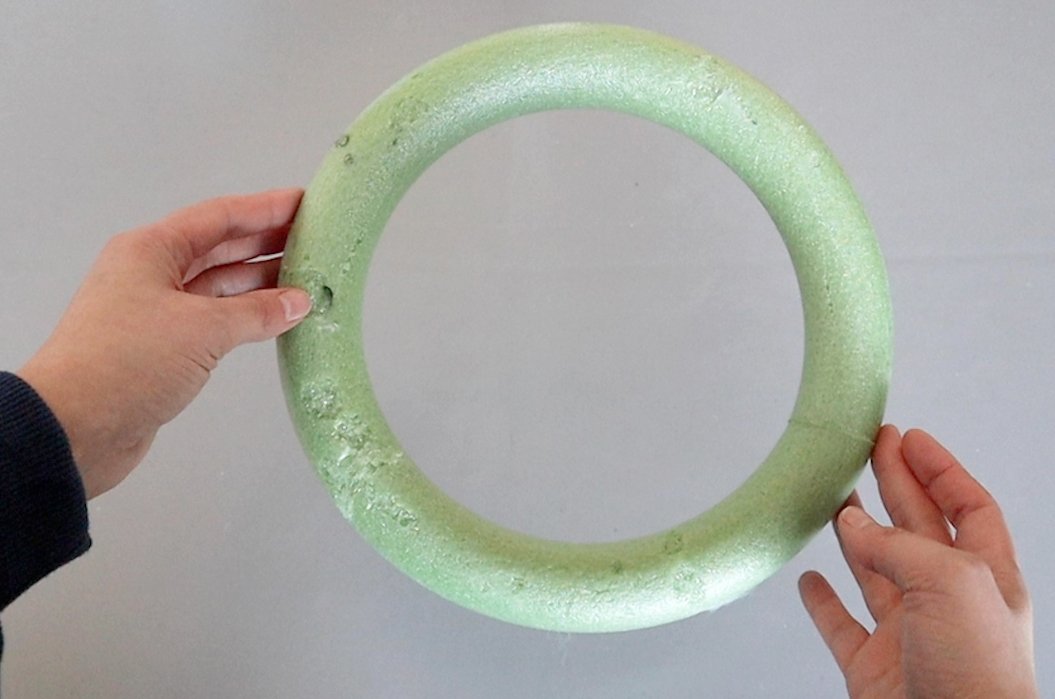
Now we’re going to make a pom pom wreath. I have this foam floral ring and a bunch of pom poms.
We’ll just glue the pom poms down, starting on the outer edge.

Then work our way around the top edge.
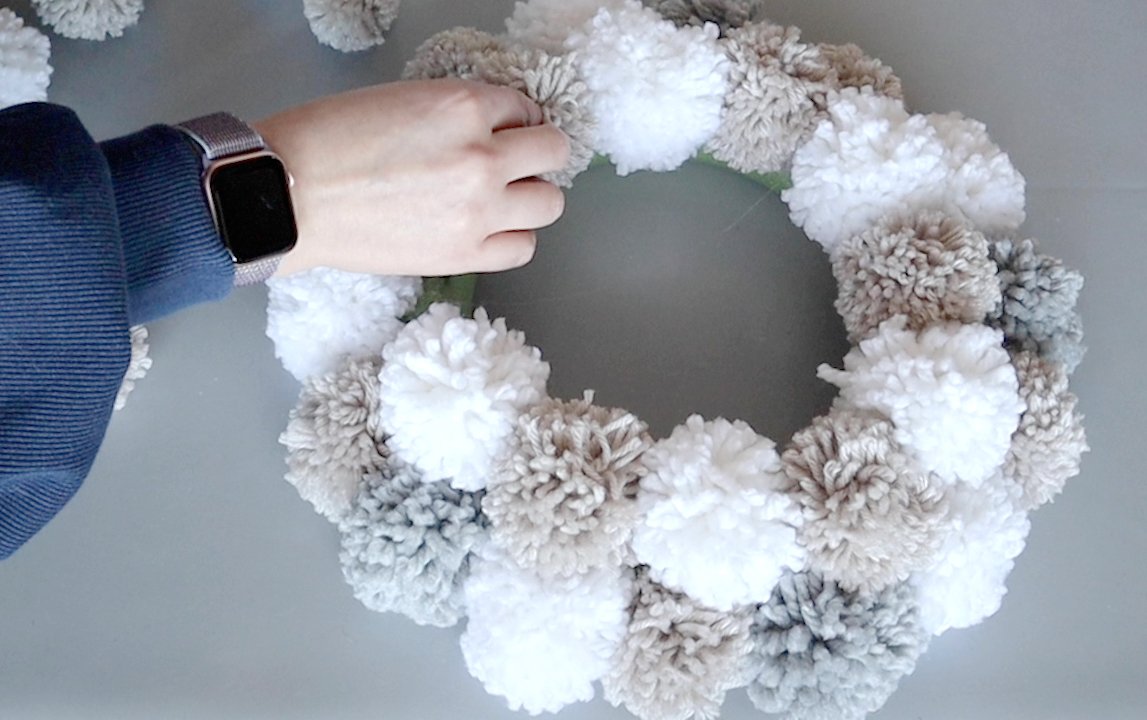
Then go to the inside edge and finish off the pom poms. You don’t have to worry about the back side, because that will be against the wall.
I did need a couple more pom poms, which I put together with my pom pom maker. I actually love making pom poms with this tool. It is really fun and relaxing and my cats always have fun batting around the yarn as I make them.


This is such a full and beautiful wreath just as it is. If you want to add a little something more, you could add just a bow.

I wanted to add a few bottle brush trees to mine as well. Here’s what it looks like with those.

If you were inspired by these DIYs then subscribe to my email list below. I only send updates every month or so, because I want to respect the cleanliness of your inbox!
I also have more blog posts that you may like below. Thanks for reading and I hope you have a creative day!


FTC: Not Sponsored. All opinions are always 100% honest and my own. Some links may be affiliate links. If you click a link and buy something, I receive a small commission for the sale. It doesn’t cost you anything extra and you are free to use the link or not as you choose. If you do use my links, I appreciate your support.
How about some Target Dollar Spot crafts and Dollar Tree coastal transformations. We’ll be putting together tiered tray miniatures to decorate our little coastal vignette.