
AMAZING Christmas Thrift Flips!
Want to see how thrift finds were transformed into elegant Christmas decor? Then come craft with me to see how to create these Christmas thrift flips.
I created a video you can click on right here in case you want to see the tutorials in action. Don’t forget to “Subscribe” while you’re on my YouTube channel!

// santa to angel
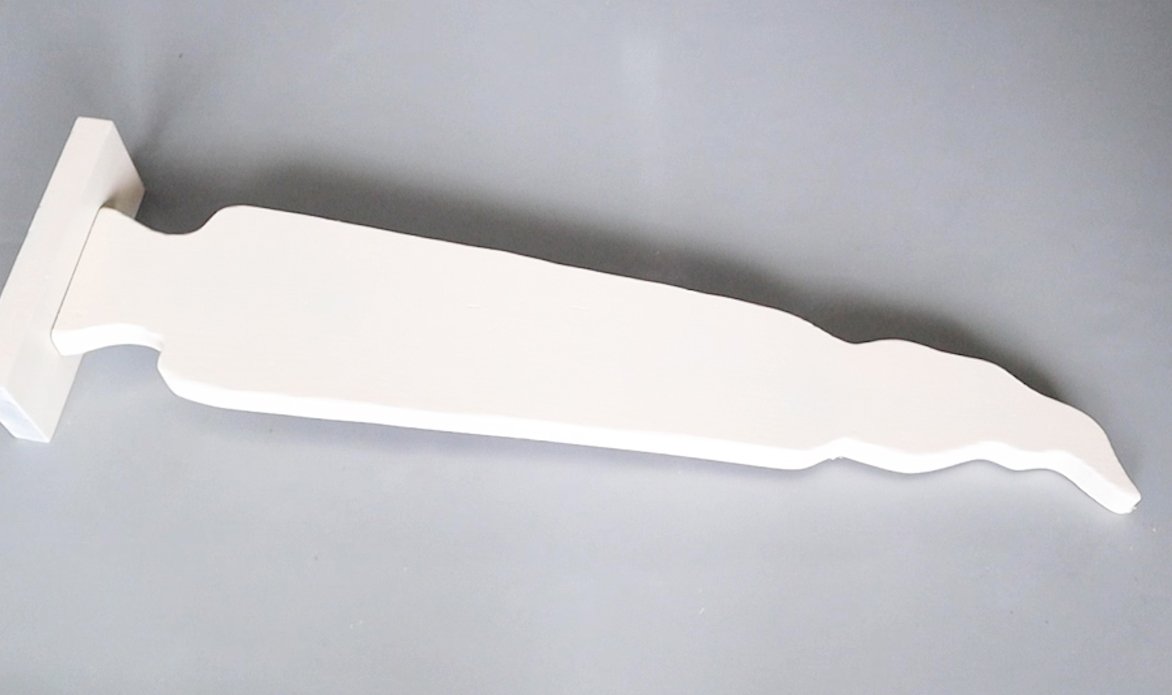
My local thrift store was all set up for Christmas and there were some really good finds! So, let’s start with this Santa. He’s cute, but you can tell he’s had lots of years going in and out of those storage boxes.

His beard is scraggly and you can see some yellowed glue on his beard. I’ll be using the completely untouched side for our new design, but I want the beard off, so it doesn’t peek through behind our angel.


I got a nice coat of off-white spray paint on here.
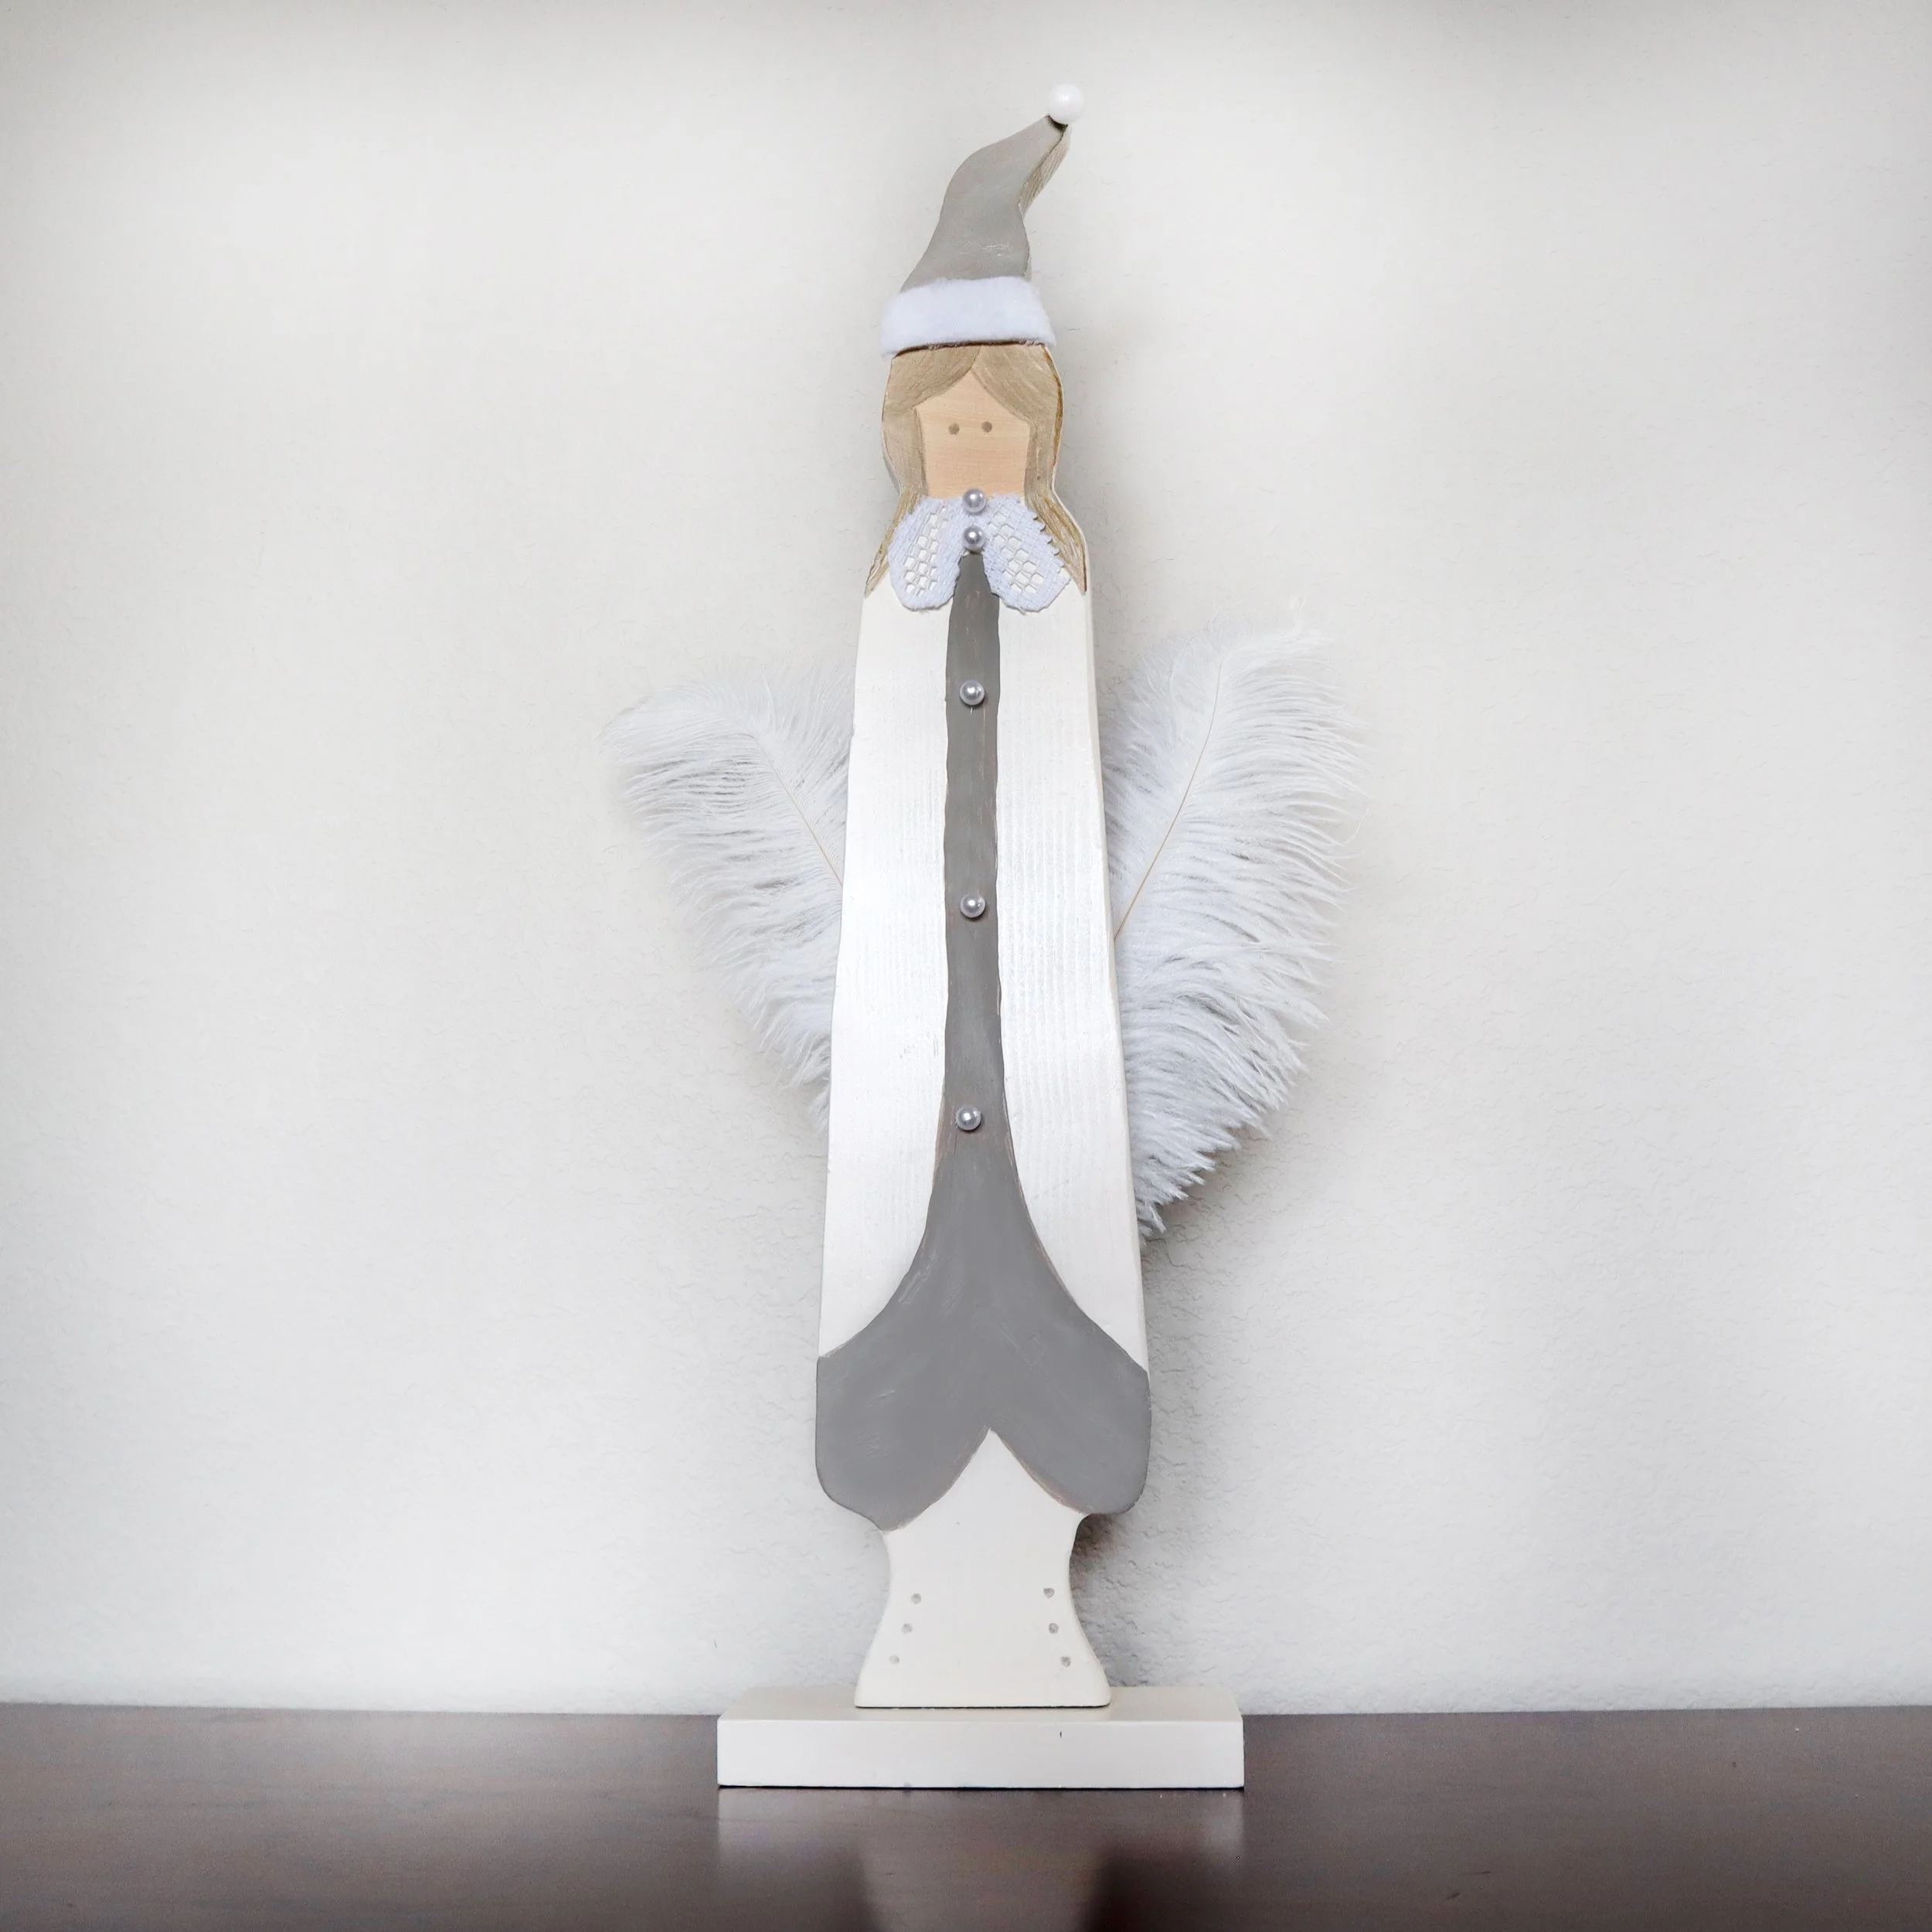
I want to turn this into an angel, so I did a little sketch to figure out how her robe and hat would look.

I’m going to start by mixing up some paint for her face. I think I’ll try to make her coloring similar to mine, so I’m doing a peach skin tone and dark brown hair, but you could go with whatever color angel you prefer.

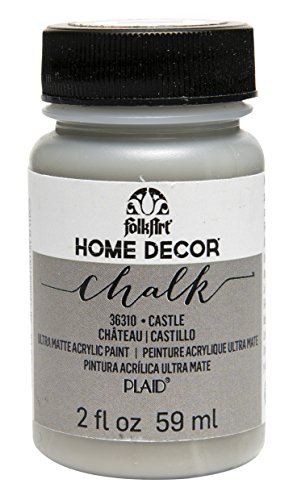
Now for the robe, I with a metallic rose gold, but I was really disappointed that it was streaky and I did a couple coats and it still looked streaky. So, I ended up going with my Folk Art chalk paint in the color “castle”. I think this was for the best though, because I used this grey paint on a lot of my Christmas decor this year.
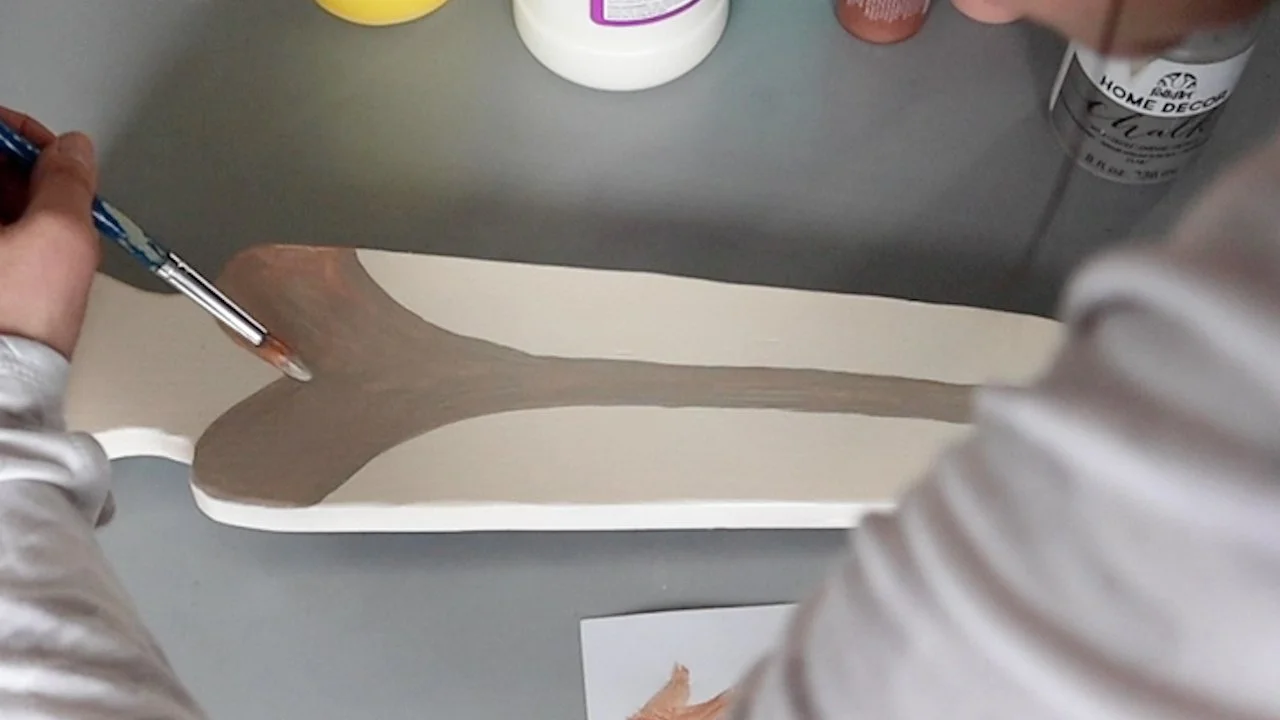
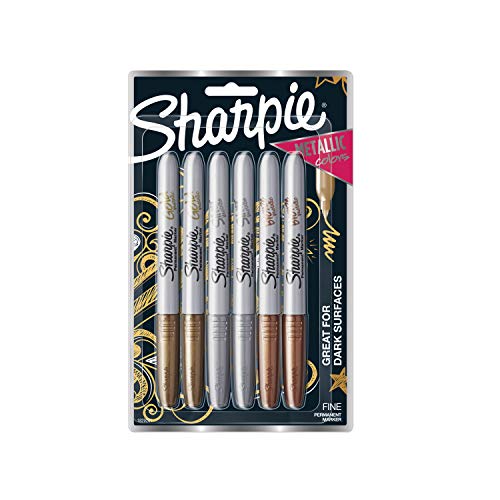
Then I took a gold Sharpie, but it kind of ended up looking like a brownish grey and I used that for the buttons on her shoes and the face and hair.

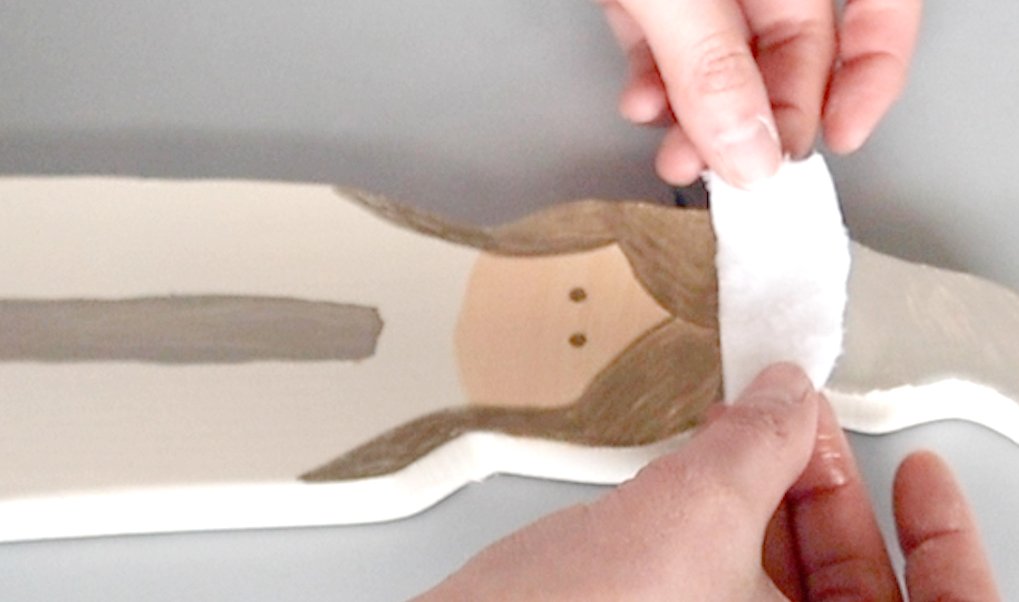
I used some of that white microfiber cloth for her hat and then attached a foam ball at the top of her hat. I also used some of that microfiber cloth on the back, so you wouldn’t see the remnants of the Santa.
I found this lace doily at Dollar Tree and I cut out a couple pieces to create a collar.

You knew I was going to pull out my roll of super fancy pearl beading, right? I’ve been using this on a lot of projects lately. I decided to use the larger beads as buttons for her dress.
Every angel needs some wings, so I grabbed these feathers which I attached with glue to the back. I found those feathers on Amazon.


Here’s a reminder of the before.

And here’s the after.
// candle stick centerpiece
Wait until you see what we do with this candlestick. Now, it looks pretty as it is, but I want to make this the same off-white color as the angel.


I love how it came out! Let’s give it a hint of distressing to pull a hint of that gold color underneath the white paint.

Let’s work on the decoration for the top. I found this gold metal basket at Dollar Tree and I’m going to just gather all the greenery I can find and use floral wire to attach it to the basket.

I wanted to incorporate some Christmas garland and you can find these garland ties at Dollar Tree. But I want to soften that green a bit, so I used a touch of spray paint on them and they turned out beautiful!


I added those garland ties on the top and bottom to hide the edge of the basket and added some white poinsettias to any empty spots or places where you could see the gold basket peeking through.

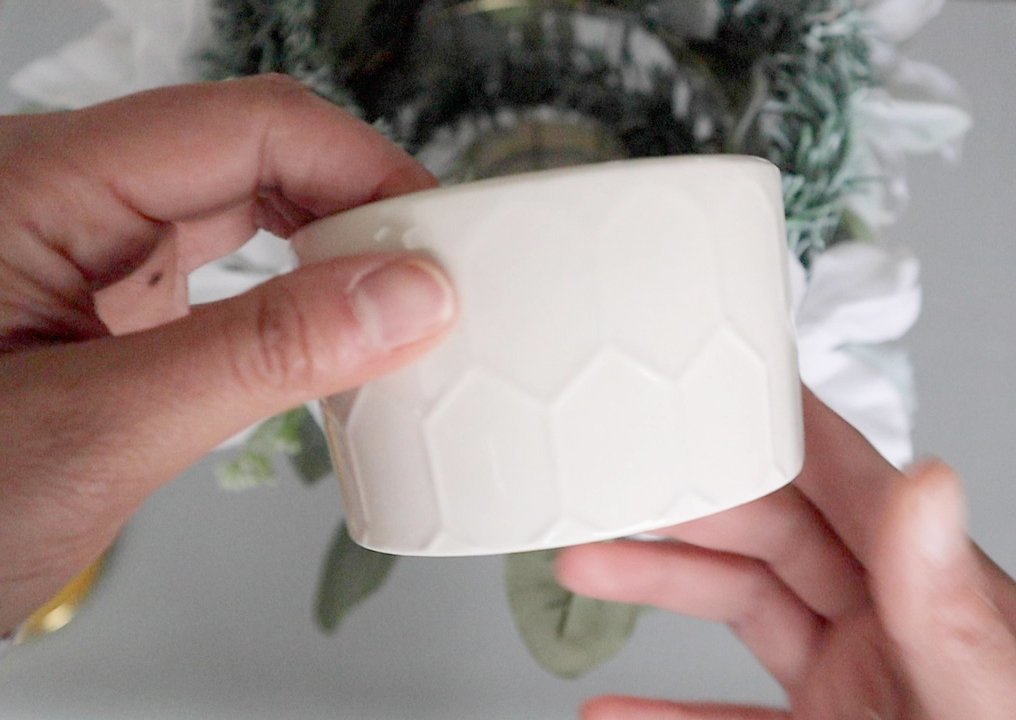
You can find this porcelain jar at Dollar Tree and I’m going to use it as a stand for our candle and then I’ll place Dollar Tree moss all around inside the basket to finish the look.
Here’s a quick look at our original thrift find.

Now let’s see that transformation.

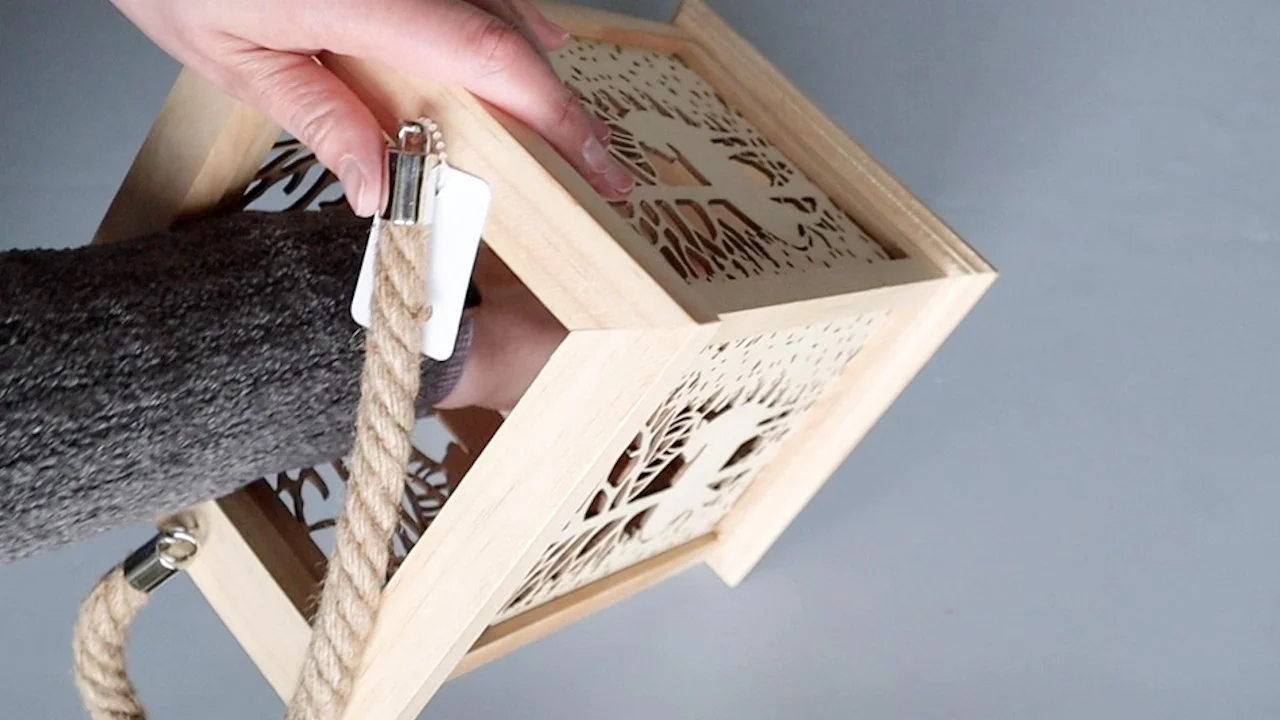
// lantern makeover
This was another great thrift find! This lantern has winter written all over it and I think with just a few tweaks we can give it a new life. It has that pretty winter scene on all 4 sides.
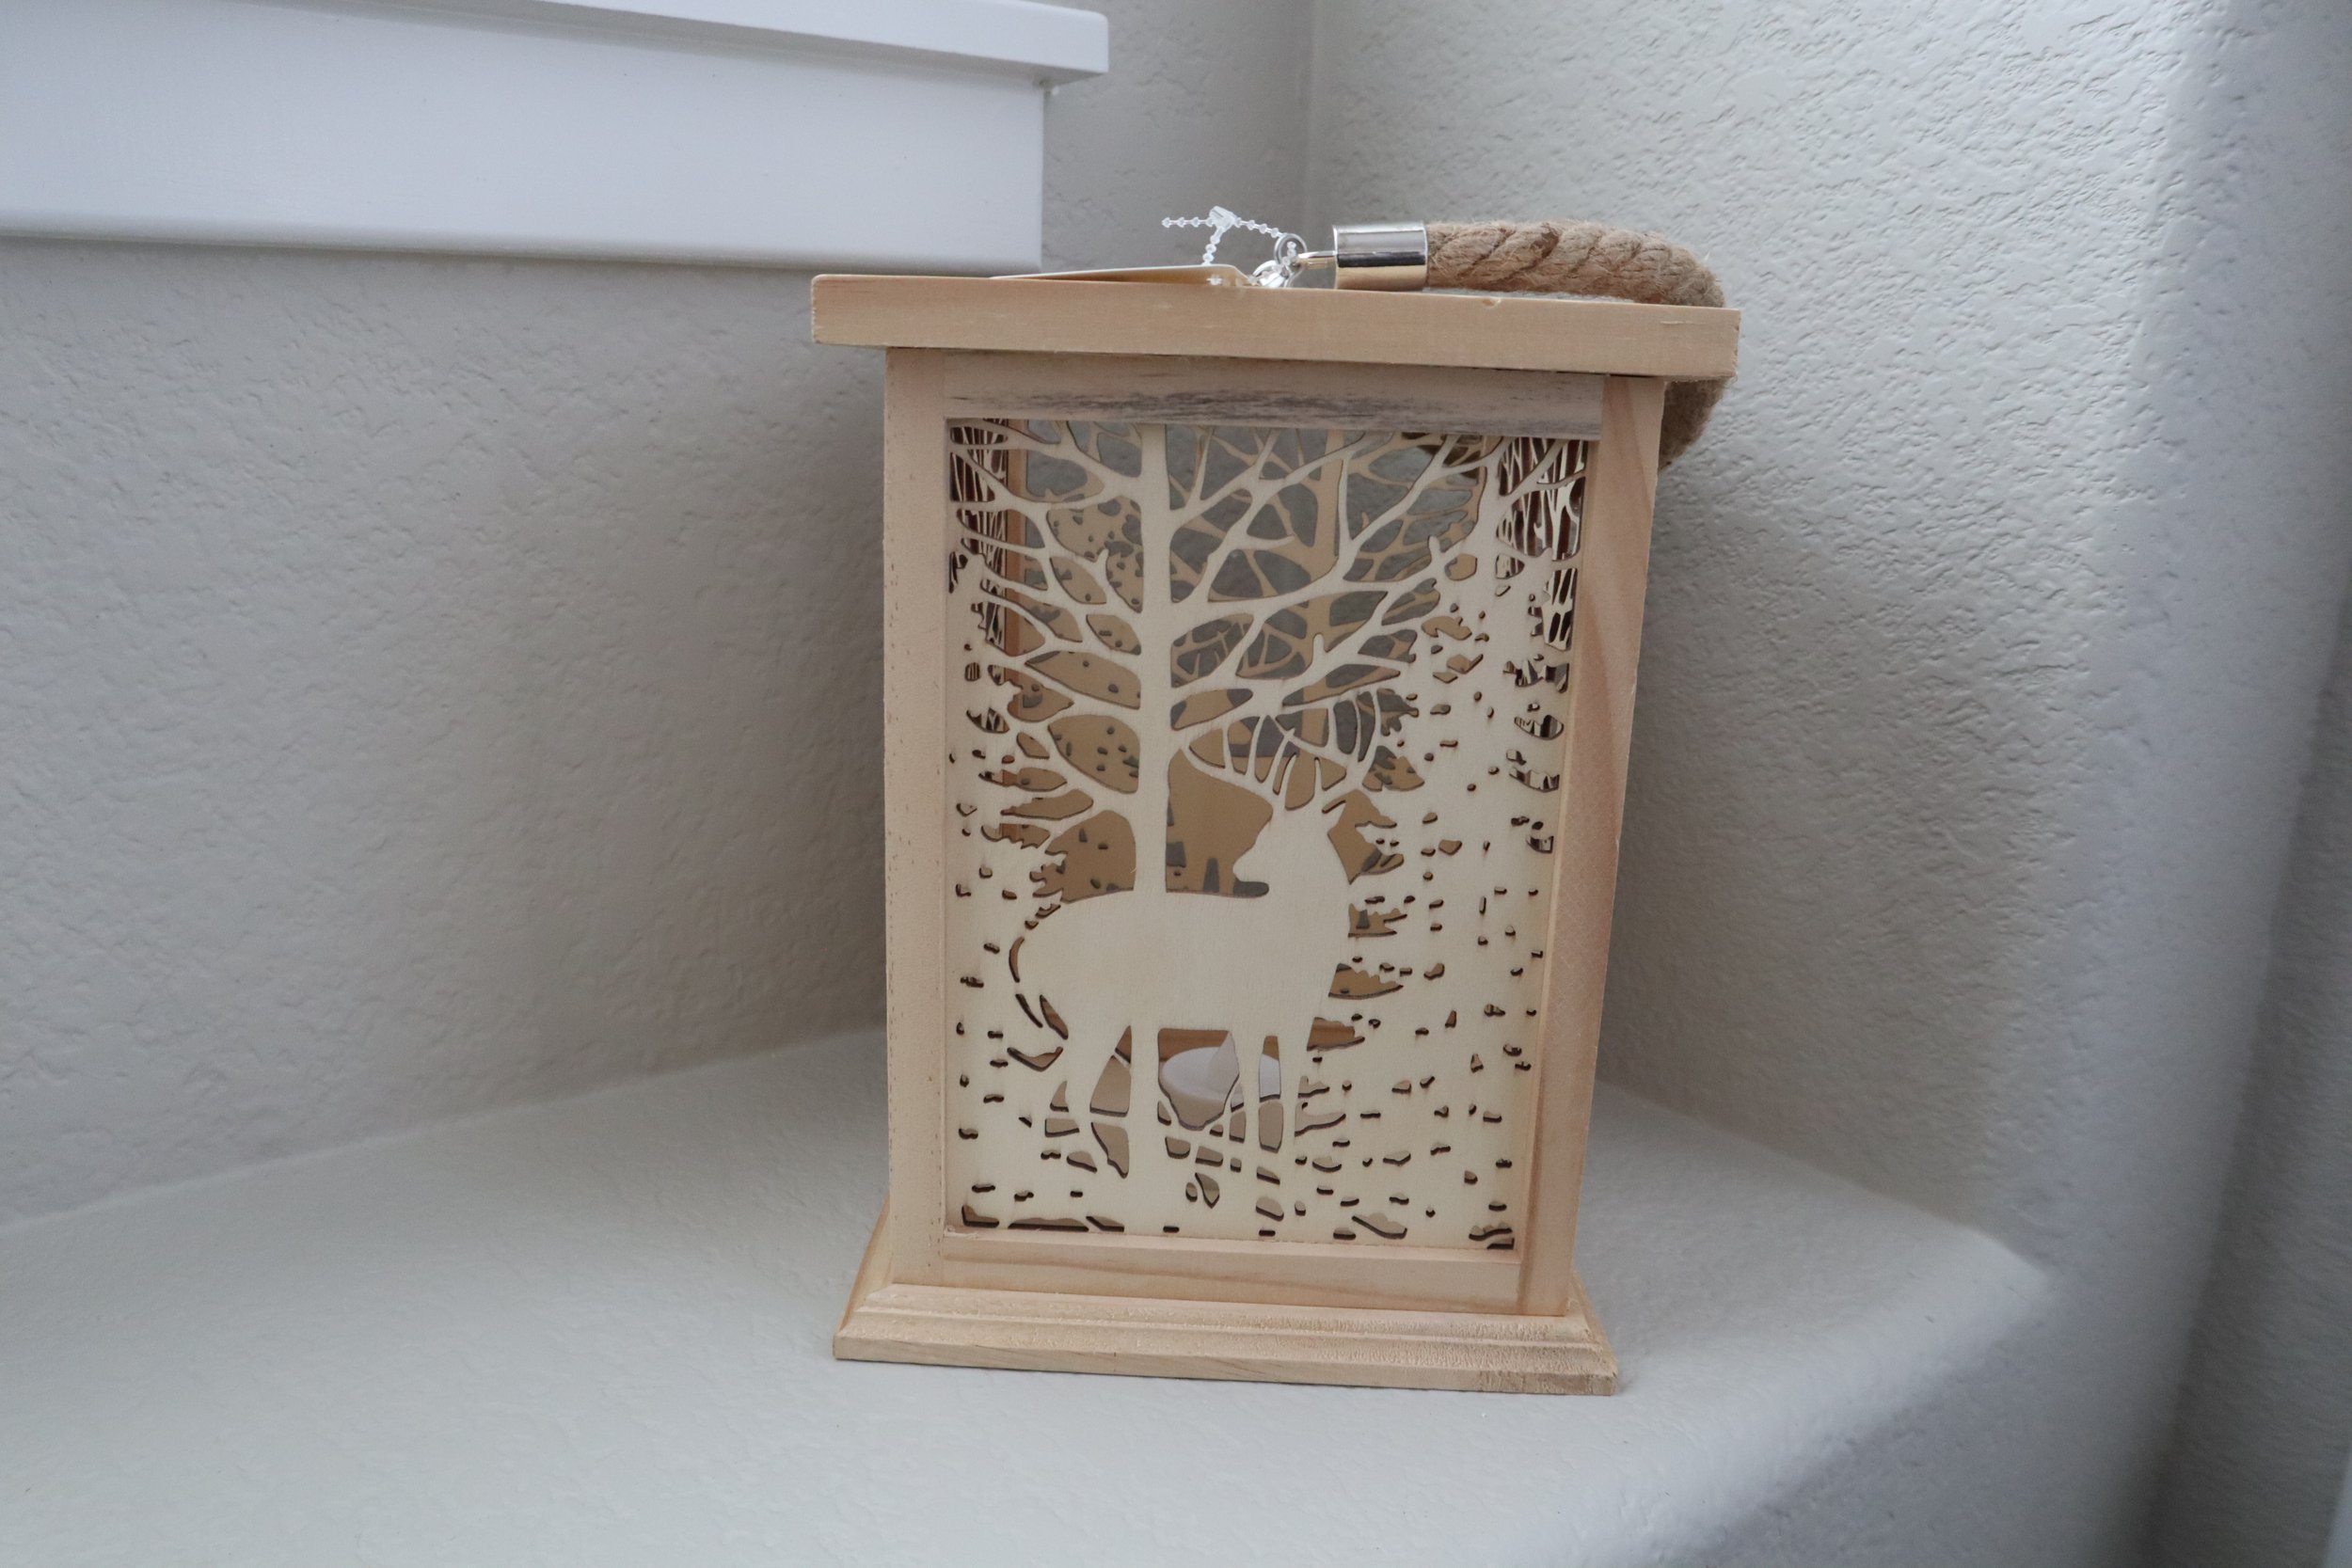
I was trying to figure out why it got given to a thrift shop and I think it’s because this candle requires a weird battery. Certainly not one I have sitting around! So, I popped that candle right out of the center - I like the look of natural flame better anyway.
I’m not a fan of this yellowish looking wood. I think a nice coat of whitewash would brighten it up and make it look a lot more elegant.
Tempura is a water-based paint and tends to be a bit thin and runny. It will work great for white washing the lantern.
I started by wetting my sponge brush and adding the white tempura to a little water. Then I added a touch of gold to make this more of an off-white color. This paint will soak in to the wood more as it dries.
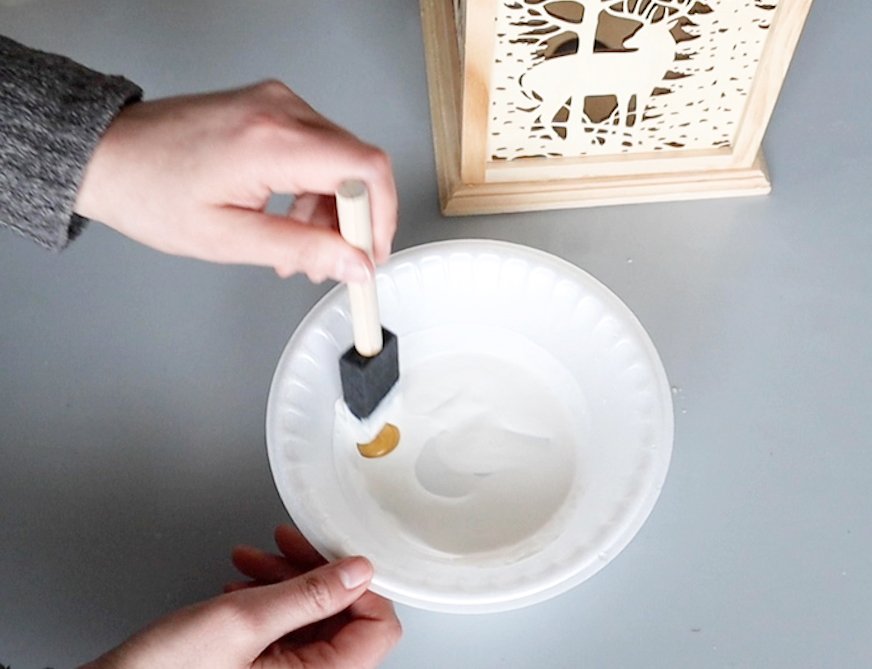
You can see the comparison on the top here. You can still see the texture of the wood underneath, but it has a much brighter and less yellow appearance. Just what we’re going for.

Now that I finished painting the lantern, let’s make a bow using this Dollar Tree ribbon. It’s so pretty with the satin finish and the touch of gold glitter. I think I’ll display this on top of a garland wreath, so the bow will look best at the top.

I dug around in my Dollar Tree Christmas stash and found a few items with gold that I think will look nice with the ribbon. Now it’s just a matter of assembling everything together.

Now remember that kind of boring lantern we found for 5 dollars?

Let’s take a look at the jazzed up version.

If you were inspired by these DIYs then subscribe for monthly emails with the form below.
I hope you have a very creative day and happy holidays!


FTC: Not Sponsored. All opinions are always 100% honest and my own. Some links may be affiliate links. If you click a link and buy something, I receive a small commission for the sale. It doesn’t cost you anything extra and you are free to use the link or not as you choose. If you do use my links, I appreciate your support.
How about some Target Dollar Spot crafts and Dollar Tree coastal transformations. We’ll be putting together tiered tray miniatures to decorate our little coastal vignette.