
Budget Friendly Dollar Tree Christmas Decorations
Yay for easy to make Christmas decorations from Dollar Tree! This sage green and white Christmas decor looks elegant all winter long. I’ve been doing a lot of dupes lately, but these crafts today are just me freestyling and seeing what I can come up with using Dollar Tree and Target dollar spot supplies. So, come Christmas craft with me as we get in the Christmas crafting spirit!
Have you landed here for the FREE PRINTABLES? Just fill out the form below and the PDF will open in a separate browser window. I’ll also have this linked at the bottom of the post, in case you want to scroll through the tutorials.

There is also this video right here, in case you want to watch me make all of these crafts.

// christmas bell sign
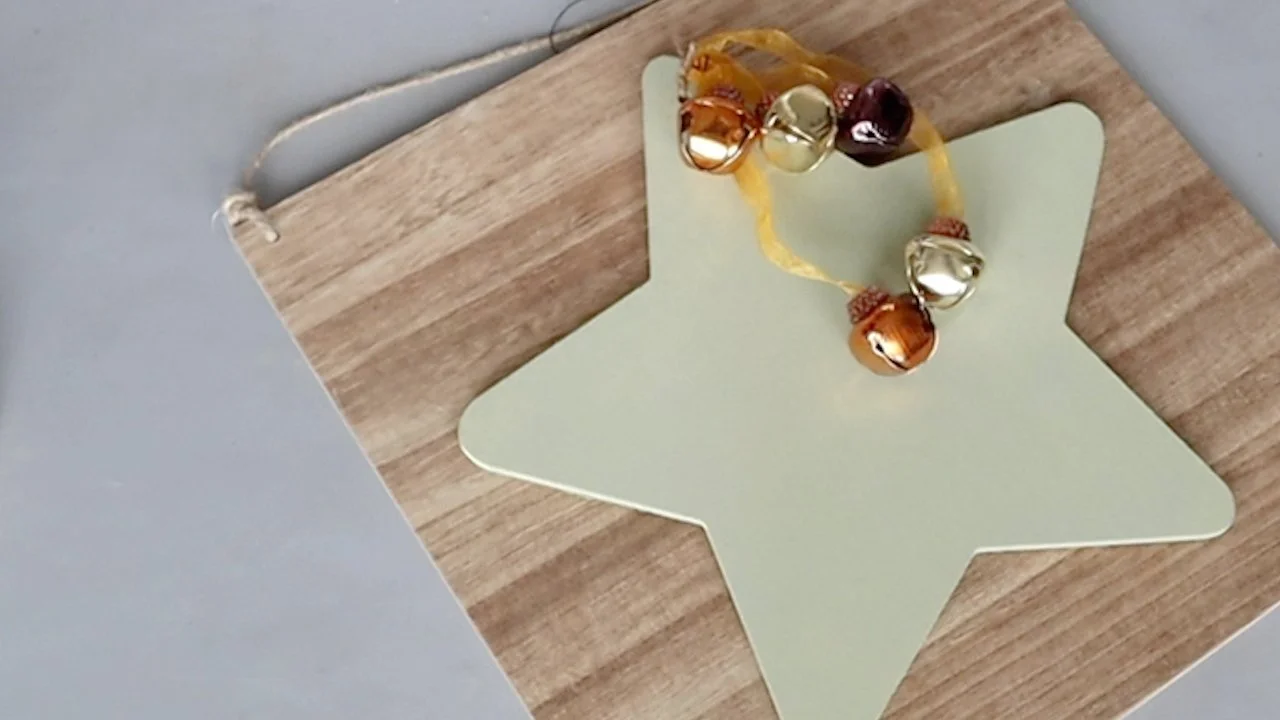
I found this star at Dollar Tree. I have this sage green paint, so let’s give it a coat of that.

I found this wooden sign in the Target dollar spot. It has two different sides, a whitewash wood and this darker wood. It came with some vinyl pieces that you can stick onto the sign to even further change the look. I think our sage green star would look really nice against this darker wood grain.

I added a few foam stickers to lift the star just slightly off the wooden backing.

I want to do a layered type piece, so I think these bells will look so pretty and add some dimension on our sign. These came out for Thanksgiving, so they do have an orange and brown ribbon…let’s remove the top part to get rid of the Fall themed bow and the round door hanger.

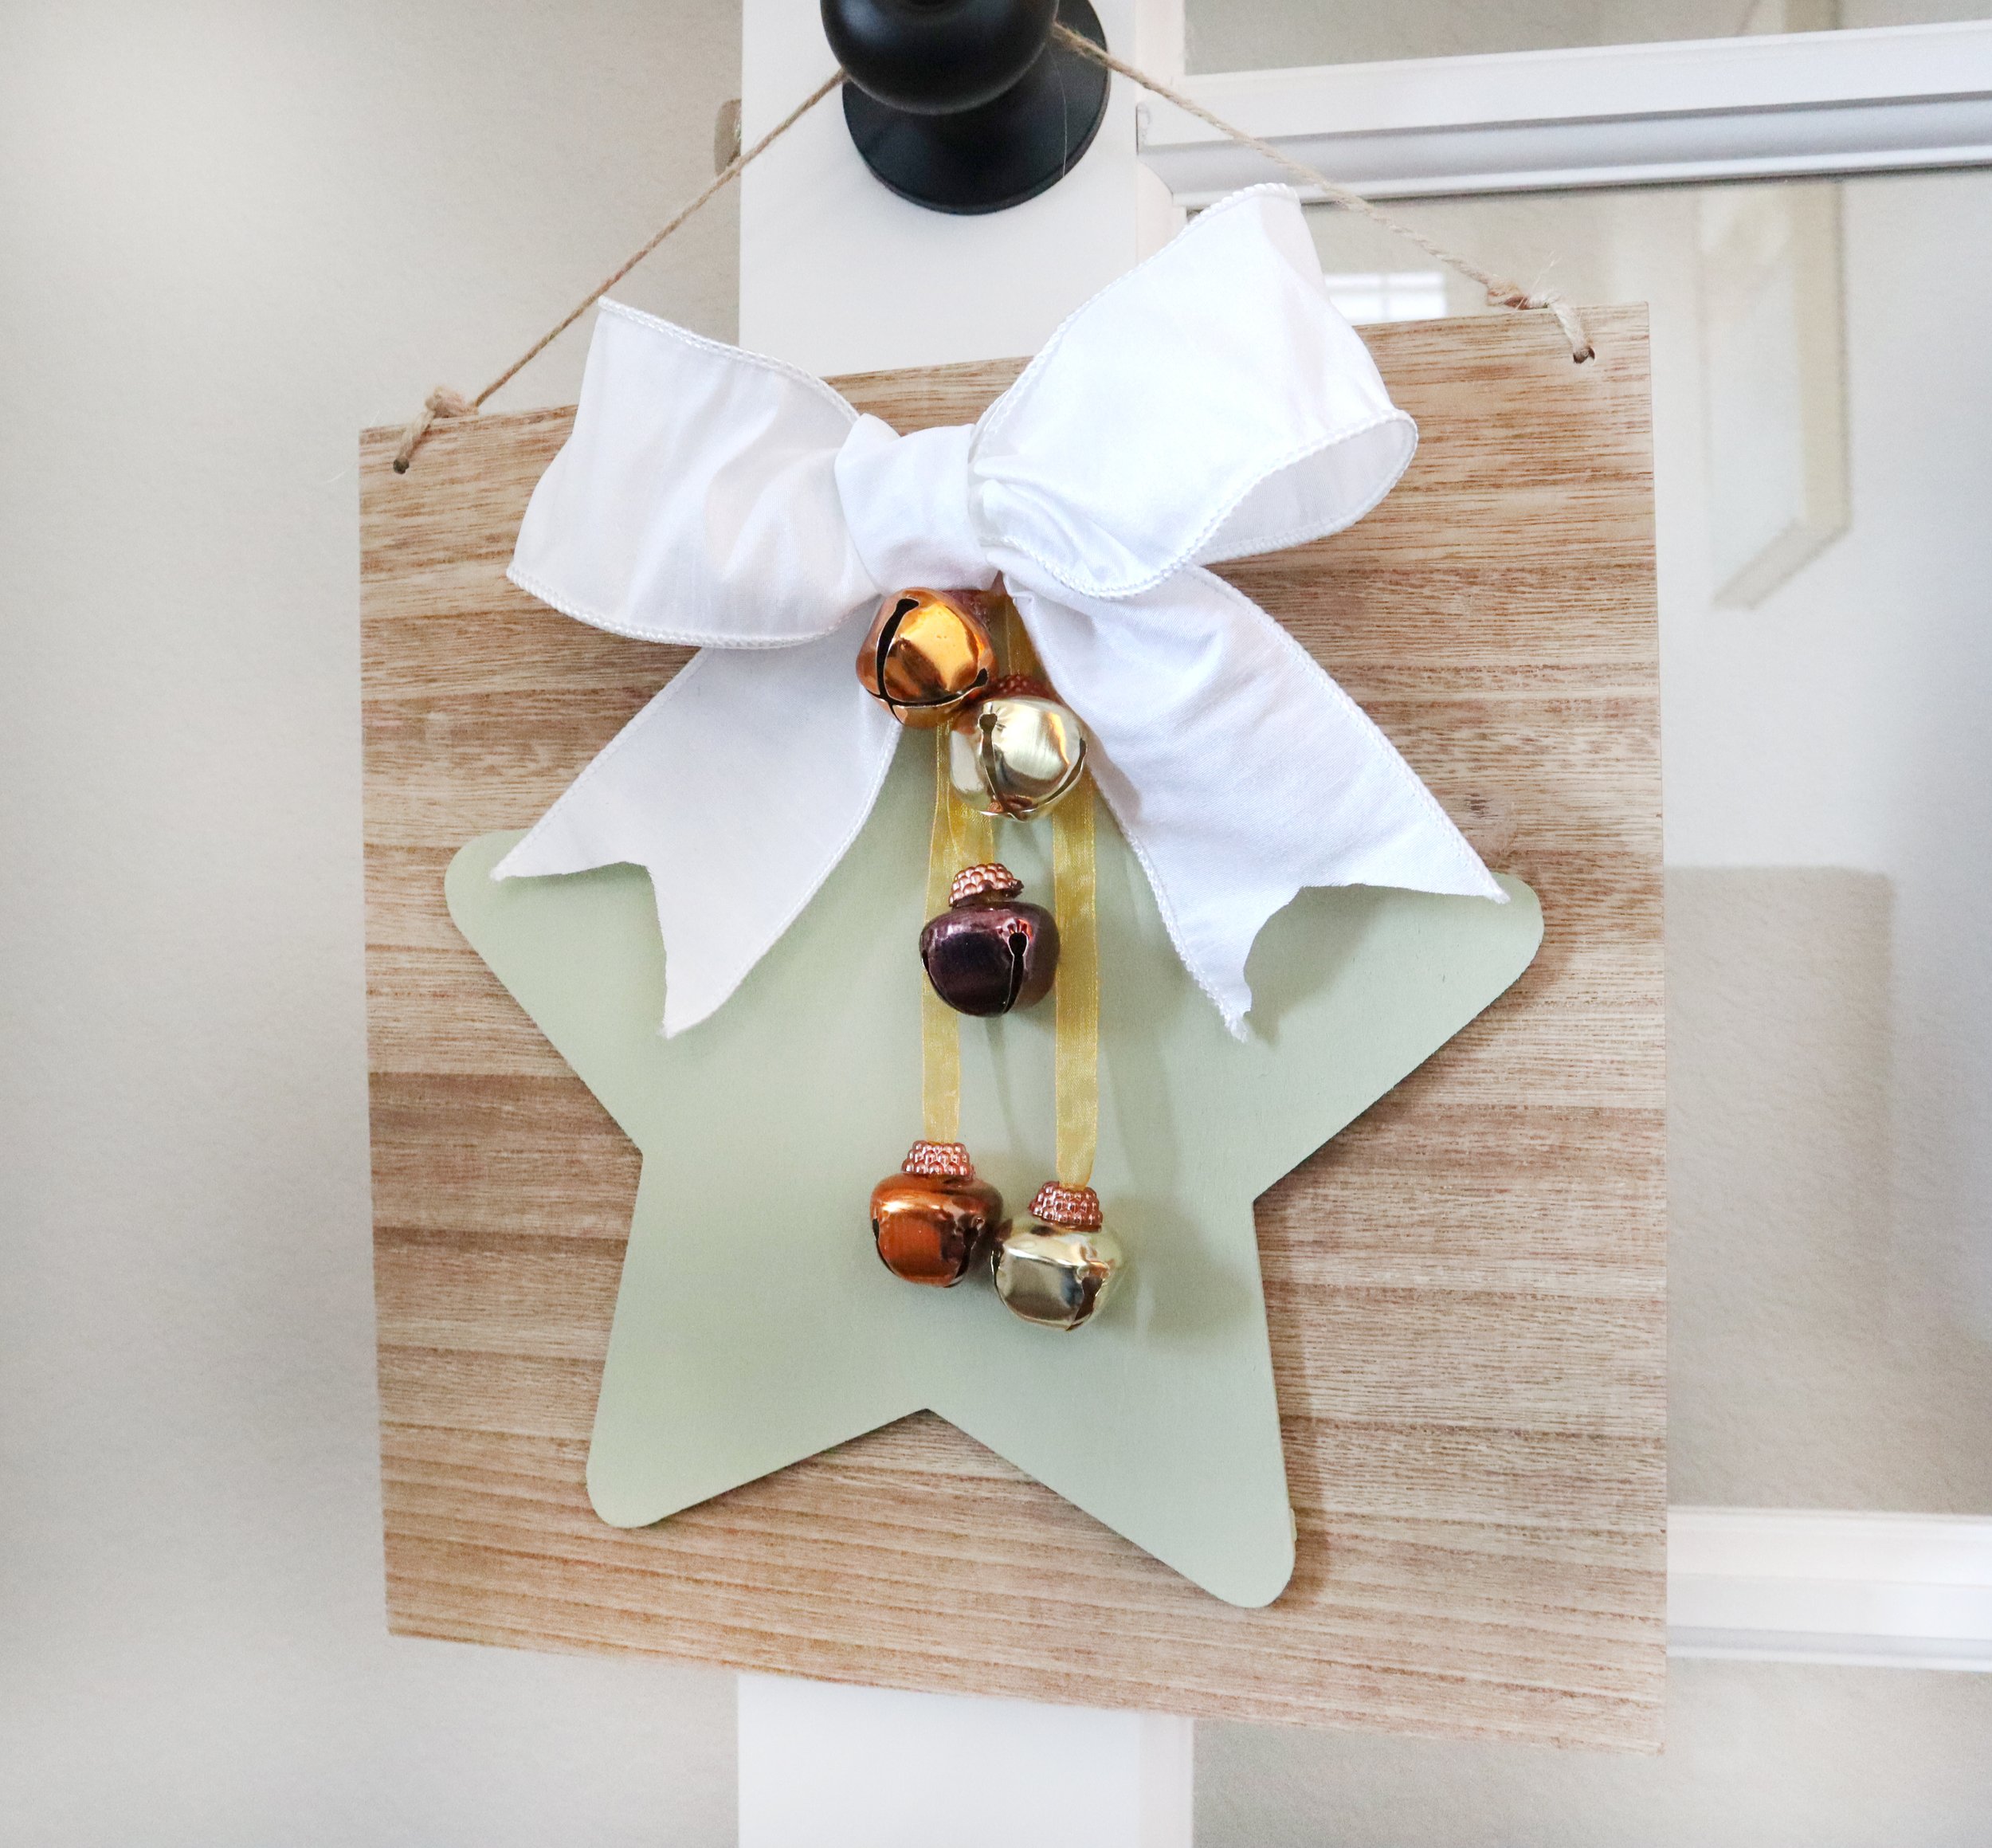
Once I cut the bells off the door holder, the bells were all separated. I sewed them together through the ribbons, then I looped a piece of twine through the hole at the top of the star sign and tied them in place.
We’ll cover all that up at the top with a bright white bow to finish this off.

// DIY Framed Garland Sign
For this next sign, you can use an old picture frame. Or you could use a canvas frame by removing the canvas and then painting the wooden frame, like I did with this one.

I’m liking the idea of tiering and using layers to add dimension to our signs, so we’ll be keeping that in mind for this one too.
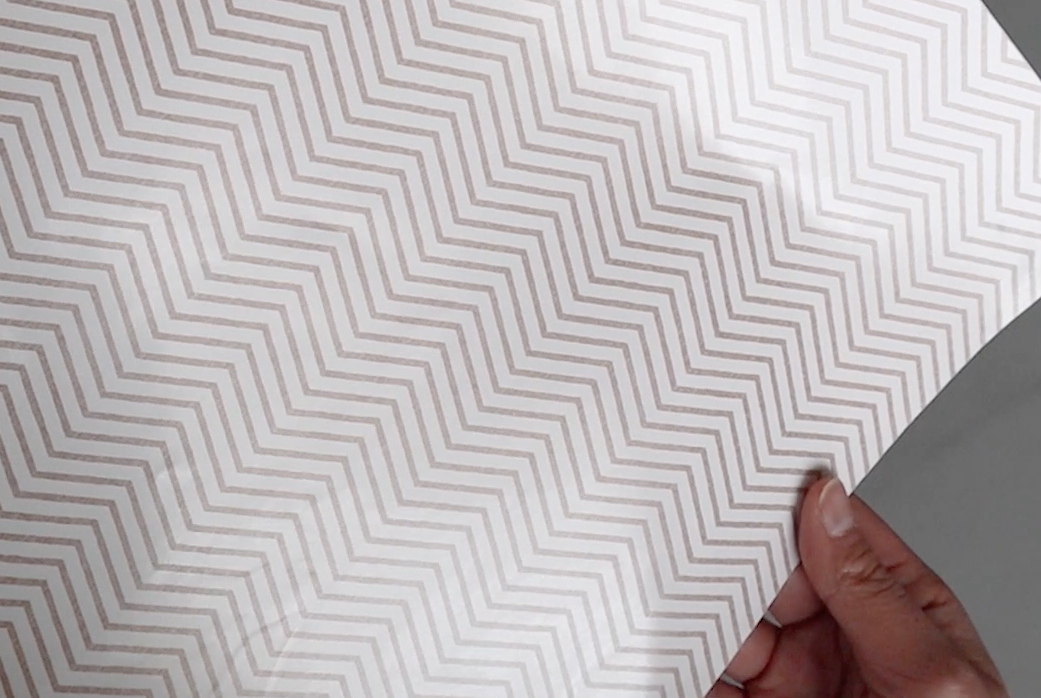
For the back of this sign, you’ll need some foam core cut to the size of your frame. Once you have that backing cut to size, then it’s time to decorate it. You could paint it a solid color or use a piece of contact paper or even some leftover wallpaper or wrapping paper.
Remember that vinyl contact paper that came with my wooden sign in the last craft? Well, I think that will fit perfectly over my piece of foam core. I like the zig zag one, but it may be a little too busy for what I have planned, so let’s use the more subtle pattern. I trimmed the corners, so the overhang would fold over the corners of the sign more easily.
I found this craft paper gift box at Dollar Tree and we’ll just be using the lid for the next part.

I gave it a coat of white paint. Then I created a printable for the top, which is a 4” circle. You can download that free printable at the top or bottom of this post.

After attaching that to the dried lid, we’ll use some greenery to dress this up. I would suggest using Super 77 to attach the sign to the lid.


You could use any greenery for this next part. Maybe some garland picks or even eucalyptus leaves. I had this greenery from a set of fake succulents that I picked up on Amazon. I wasn’t sure how to use them, so they’ve just been sitting in my craft closet, but I think they’ll look really nice on this project. I used a few dots of glue to secure this in place.


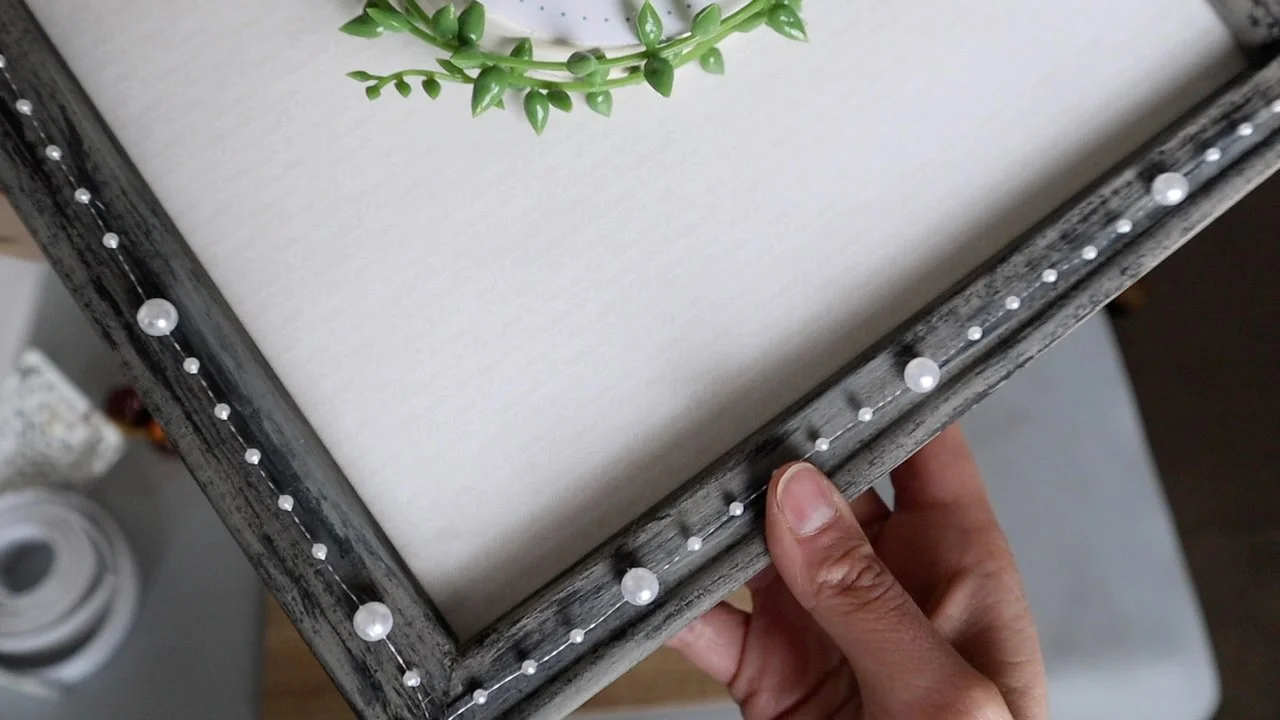
I thought something was missing, so I dressed up the edge of the frame with this roll of pearl type beads.


Another option would be to use some three dimensional stickers from Dollar Tree. They sell these in a variety of colors in the craft section.

Here is how my sign came out. I think this isn’t so in your face Christmas, that it could work for all of Winter. I really like the subtle pattern I used in the background, but you could go as bold or bright as you want on your own version.


// DIY Wooden Snowman Craft
I’ve been staring at these 3 cubes stacked up in my office, visualizing what I want to turn them into.
The smallest box on top is a solid wooden square. It was originally a natural wood color, but I had painted it for a project last year.

The bottom two boxes are actually from one wooden drawer. I separated the pieces to get two slightly different sized wooden boxes. You can find those boxes in the craft section at Dollar Tree.

We’ll start by attaching these pieces with some glue and then giving them a coat of white paint.

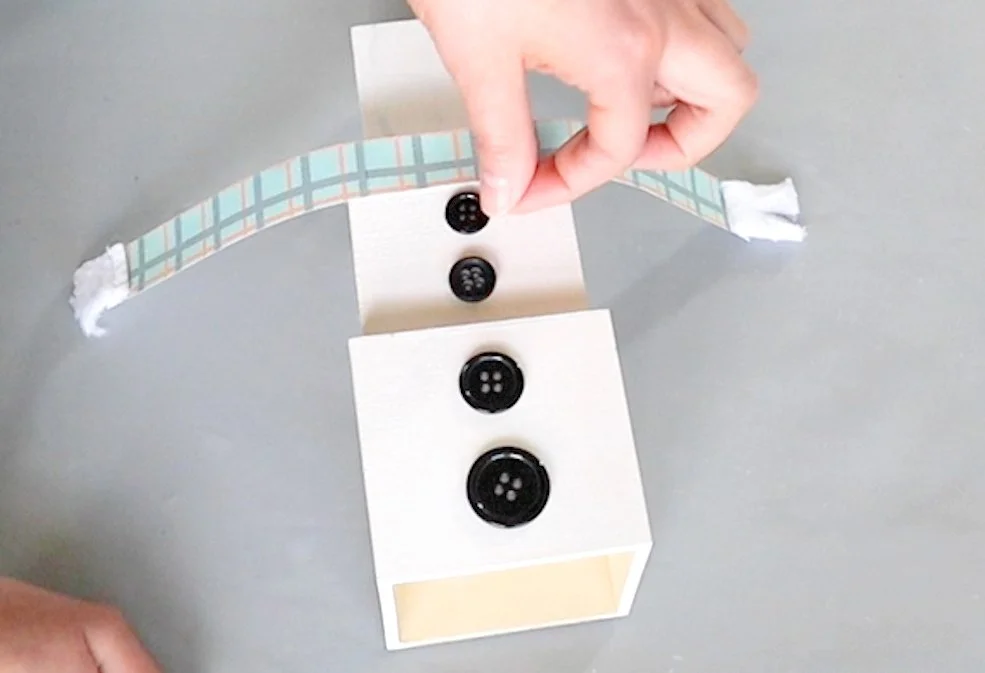
I created a plaid scarf for our snowman. This is part of that free printable at the top and bottom of this post.
I just printed this out onto plain paper and trimmed it out.

I used part of a microfiber cloth to get the trim on the edges of the scarf.


I added a few buttons for the eyes and on the front of the snowman.

He needs a cute little face, which I created with DecoArt paint pens.


I cut the scarf in half and then wrapped and glued it in place.

And here is our final snowman! He is so cute and would make any empty shelf look fun and festive.

I hope you were inspired to make one of these. Don’t forget to get those FREE PRINTABLES in the form below. Thank you so much for reading, I really appreciate you so much and I hope you have a creative day.


FTC: Not Sponsored. All opinions are always 100% honest and my own. Some links may be affiliate links. If you click a link and buy something, I receive a small commission for the sale. It doesn’t cost you anything extra and you are free to use the link or not as you choose. If you do use my links, I appreciate your support.
How about some Target Dollar Spot crafts and Dollar Tree coastal transformations. We’ll be putting together tiered tray miniatures to decorate our little coastal vignette.