
How to Make a Blanket Basket with Handles + Chunky Blanket Tutorial
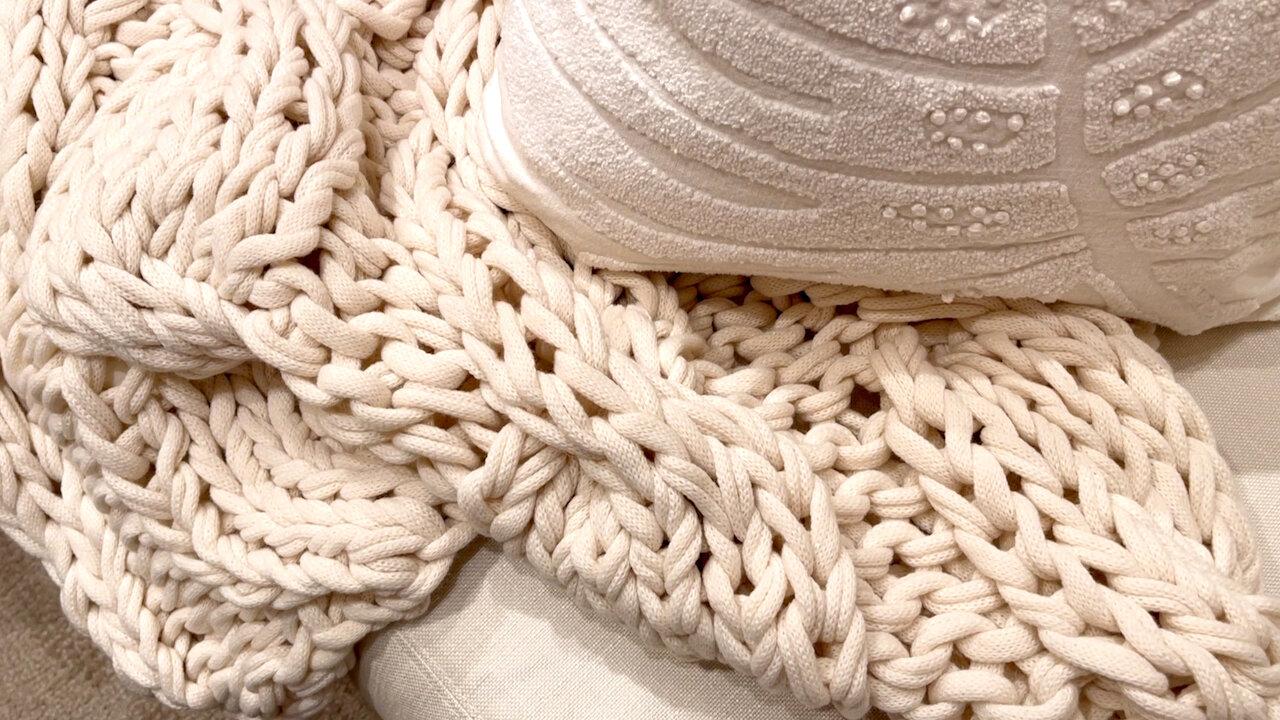
I was at Pottery Barn and saw this gorgeous chunky knit blanket and knew I wanted one for myself. Today I’ll be show you how to make a chunky knit blanket for much less than this $300 Pottery Barn version. These are so cozy and would make a great gift.
I’ll also share how to make a rope blanket basket, too. These are super easy and fun to make, so let’s get started with the blanket basket.
Click the thumbnail below for a video tutorial walking you through both projects.
// blanket basket
The basket we’re going to make is similar to these that I saw at Pottery Barn. This set of 3 is $229, so even if you split that cost in 3, each one is still around $75.

You will need about 20 yards of cotton roped cord. The exact one I bought was 40 yards and it was around $40. But since you only use 20 yards, it would only be $20. This is really sturdy thick rope, but it’s made of cotton so it’s nice and soft. But not so soft that it won’t hold its shape.

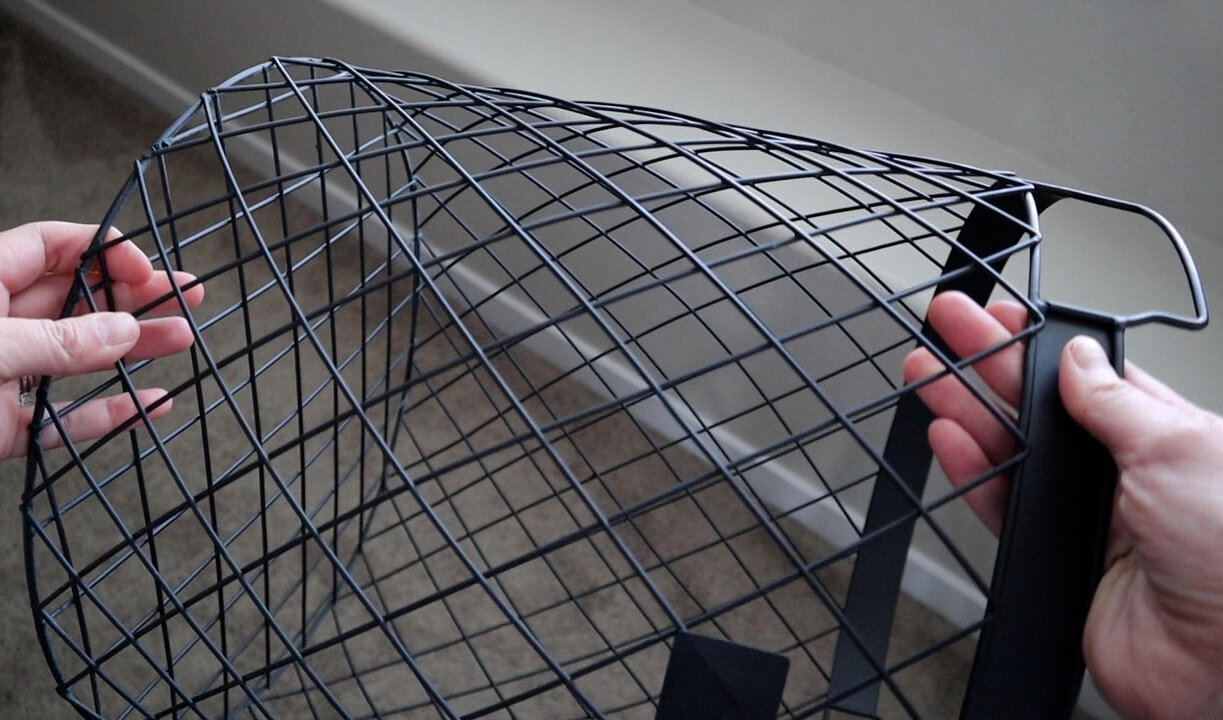
You will need a basket or trash can that you like the size of. I have this Magnolia Home blanket basket that I found at Target. It is the perfect size for blankets.
I just clipped the parchment paper into place and this will protect any hot glue from getting onto your basket template.

Make sure the starting edge is taped to prevent fraying.

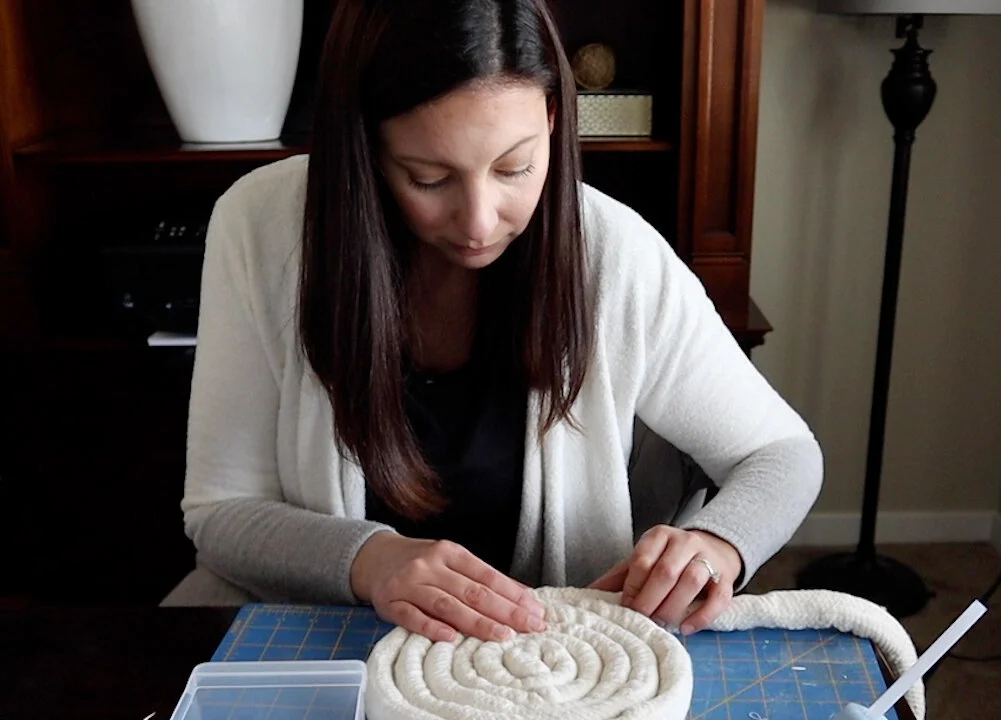
Then start wrapping the rope into a coil while securing with a line of hot glue. This will be the base of our basket.
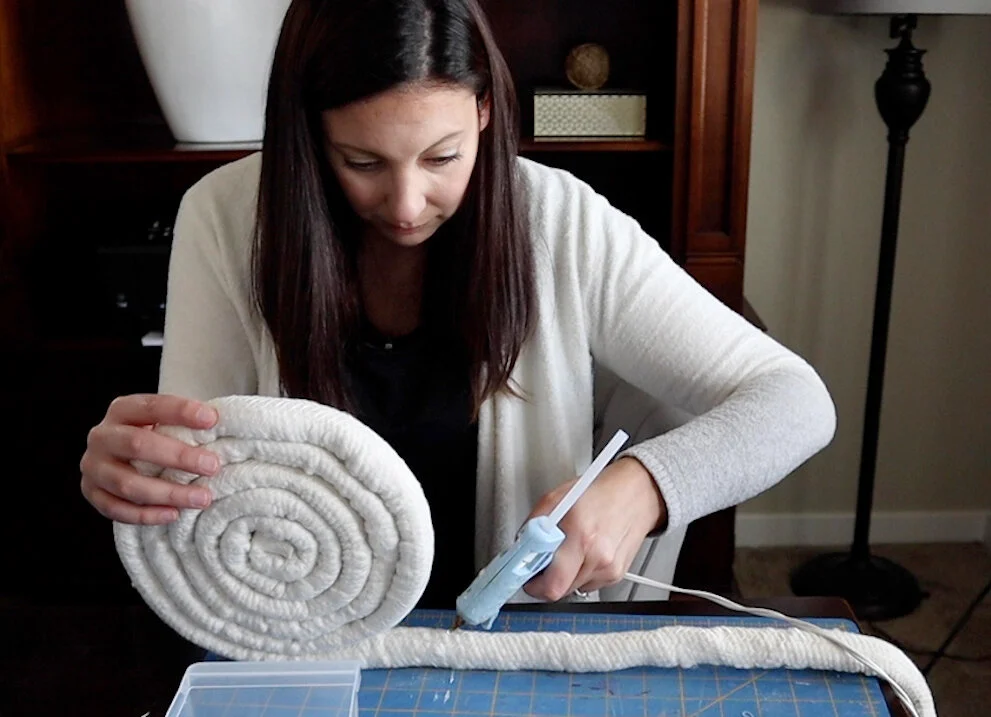
I found that laying the glue down with it sideways worked best and then laying it flat while it dried helped to make sure it stayed nice and flat.

You may want to have something handy like a popsicle stick so you can wipe up any hot glue if it squeezes out the side. You want the glue as hidden as possible.
Once you get it to the size of the bottom of your basket, you can lay it right on the basket and start wrapping up the edges.

At some point it may be easier to glue if you flip the basket right side up.
When you get the basket to the height you want, add a piece of tape tightly around the edge and trim the rest of the rope off. Then glue that into place.

I had quite a bit of rope left and will be using that on a future project.
Now for the handles. You could use this thick Dollar Tree placemat. I had already used most of this one on another project.

Or even some vinyl cabinet liner could work, since it is thick and durable.
Dollar Tree also has faux leather ribbon, so that is another low cost option.

I have some leftover faux leather that we had used to cover the piano bench, so I’ll be using that. I picked this up at Jo-ann’s.

I trimmed the piece of leather to the width I wanted the handle. Then I folded the sides, so it would have a seamless look. I glued this into place and then put it under something heavy to help it lay nice and flat.


This isn’t necessary, but I did use a Sharpie to color the edges a bit, so you couldn’t see the raw edge of the fabric.


I poked a hole into either side of the strap and then inserted a 1/2 inch screw post on either side.
Then I poked holes into the side of the basket and screwed in the handles.


Here was the cost for all our supplies.

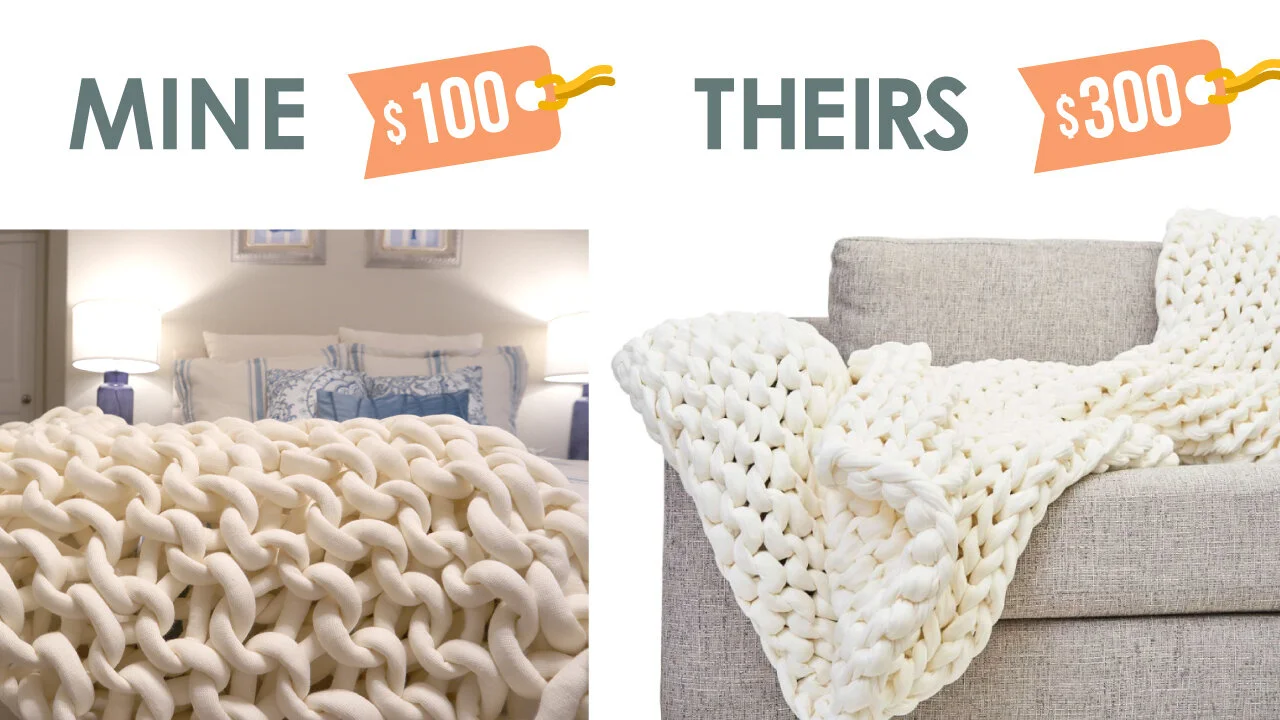
And here is mine next to the Pottery Barn version.


// chunky blanket
I loved the look of this Pottery Barn blanket, but for almost 300 dollars? That is a lot of money for a blanket!
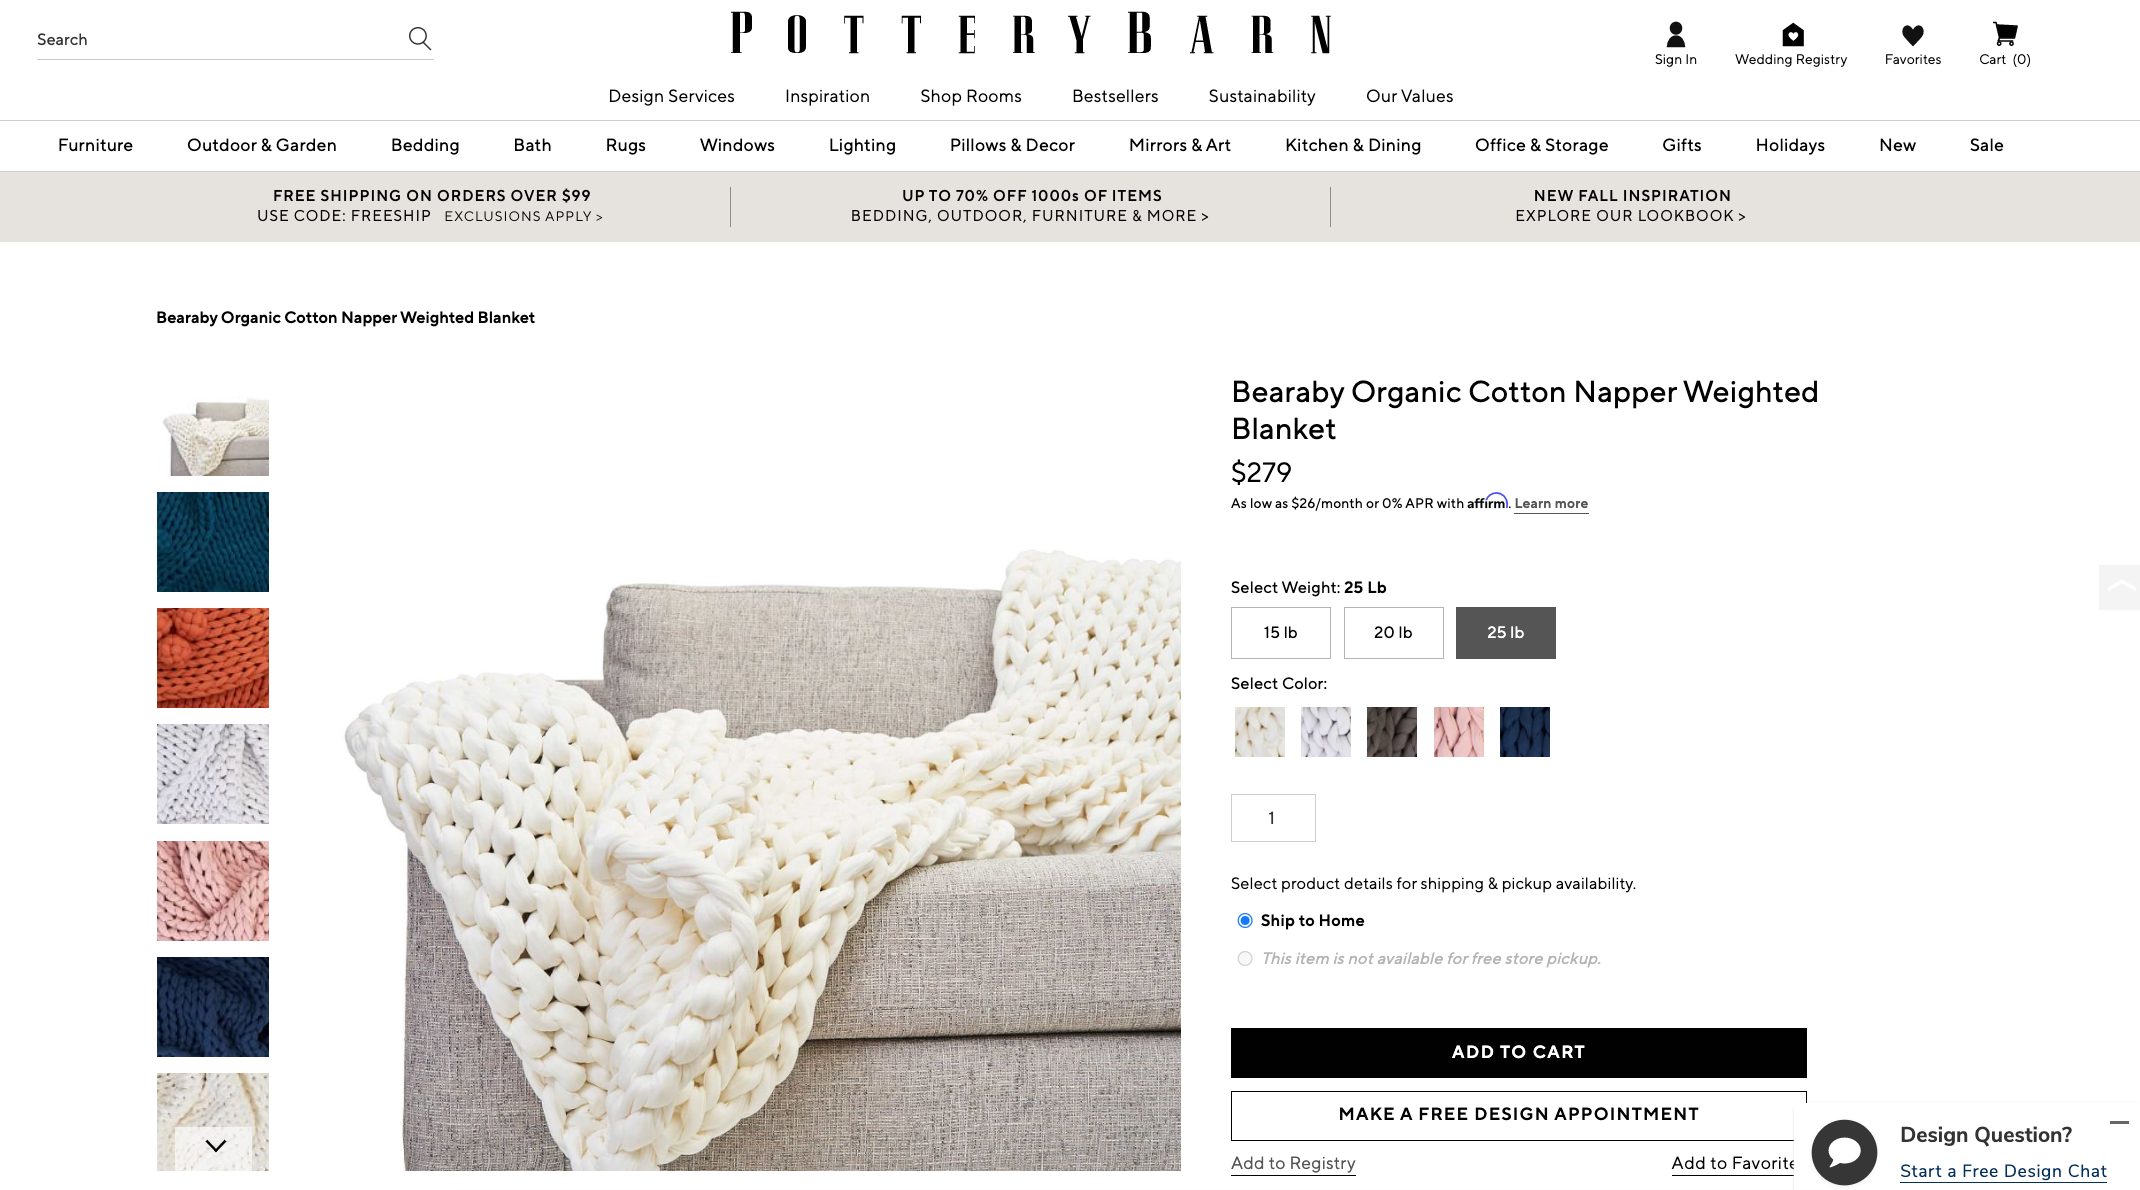
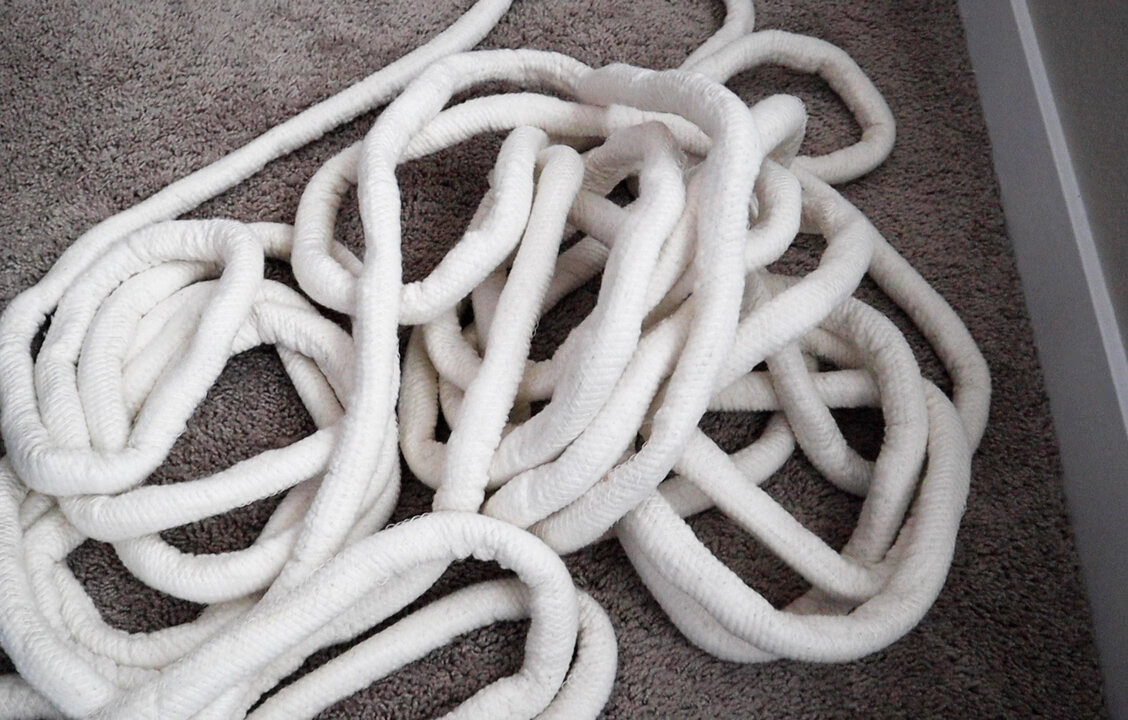
All we’ll be needing for this project is Lion Brand “Yooge” yarn. I bought this ginormous yarn for about $100.


I’ve actually seen this done in a faux fur yarn and I kinda wish I had picked that one up. But I’m happy with this one, because it’s really chic looking and will go well in my Hamptons themed guest bedroom, which happens to also be Pottery Barn inspired. Click here to see that room makeover.

Now, I’m not a pro at this. I haven’t crocheted except maybe one thing when I was 13, so if you’re a beginner or think this looks complicated don’t worry, it’s easier than it looks.
I watched some tutorials and will link those below to give them credit. I noticed I did mine a little different than most of the videos I watched and I think it has to do with me being left handed.
Jessica did a fur version and helped me learn. Click here for her tutorial.
I also want to give credit to Nadine Stay for the blanket basket inspiration. Here is her post.
My grandma was amazing at crocheting blankets and dolls and all kinds of things. She tried to teach me when I was a teenager and I remember she would say I crocheted “backwards”. So, just keep that in mind when you’re watching or reading, especially if you’re right handed.

My beautiful Grandma Ruth.
You’ll start by making a knot at the end of the yarn.

Pull through the yarn to make a loop. Keep looping through until you are happy with the length.
I wanted a short throw for the end of my guest room bed, which is a queen bed. If you’re standing at the base of the bed, this part will be the left (or right) edge of the throw. I was a little short on yarn for it to be as long from left to right as I wanted, so I think if I would have done 8 or 9 loops here, instead of like 16, it would have been the perfect amount of yarn. The good thing is this yarn can be easily un-looped if you mess up, so you can go back and fix any mistakes!
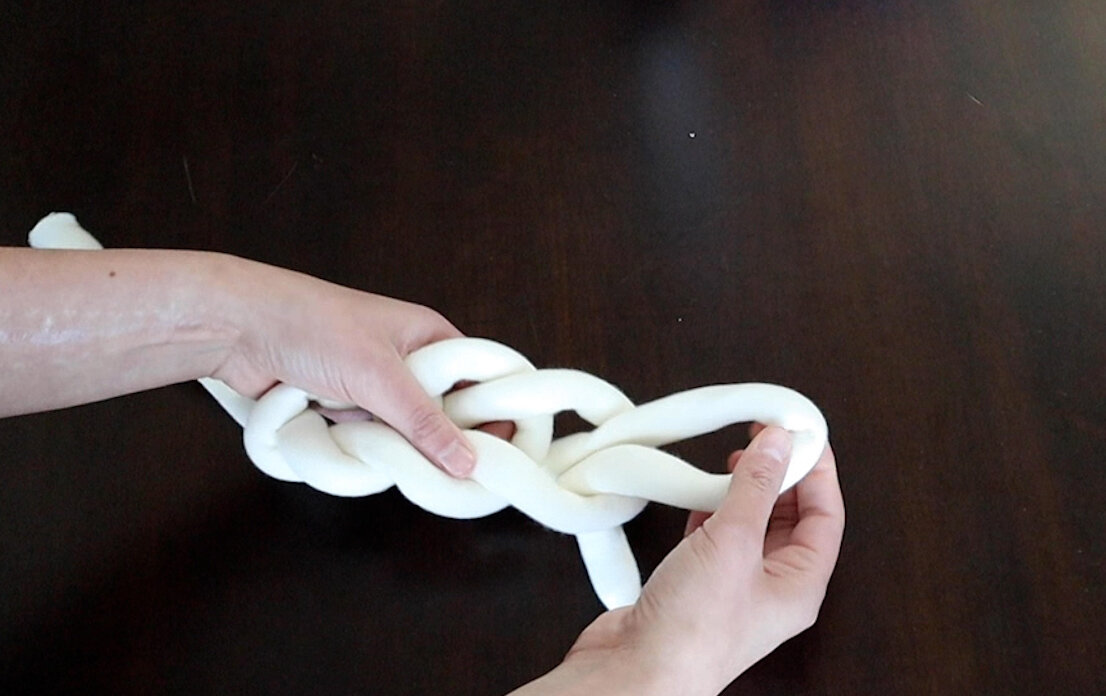
When you have your chain to 8 or 9 loops, start looping through each hole of the chain.
When you get to the end of a row, make 2 loops, since you will be starting a new row. Go back and forth this way until you get near the end of the yarn.

I seemed to get better as I went along at keeping the loops a consistent size. You kind of get into a rhythm as you go.
Making this blanket has gotten me interested in trying some crocheting and maybe knitting, so I’ll have to let you know how that goes when I get back into it.
Do any of you knit or crochet and if so who did you learn from?
This last part is called “casting off”, which just means giving the edge a finished look and will help keep everything in place.

Take the two end loops and pull the extra piece of yarn through to create another loop. Repeat all the way across.
Tie a little knot at the end and you can weave any excess yarn through the side. It will hide in the rest of the yarn nicely and just make the blanket that much cozier.

This was actually really fun to make and went a lot faster than I thought it would.
Since this is home made, it would make a great gift.

We only paid $100 for the “Yooge” yarn and that is 1/3 of the cost of the Pottery Barn version and it looks just as good for way less money.

I hope you enjoyed these tutorials. I know they got my mind racing with ideas of what I want to crochet and knit next.
Even for a beginner, these were really easy and much quicker to make than I thought they would be. Tag me on social media or leave a comment below, if you’re going to try one of these projects.


FTC: Not Sponsored. All opinions are always 100% honest and my own. Some links may be affiliate links. If you click a link and buy something, I receive a small commission for the sale. It doesn’t cost you anything extra and you are free to use the link or not as you choose. If you do use my links, I appreciate your support.
How about some Target Dollar Spot crafts and Dollar Tree coastal transformations. We’ll be putting together tiered tray miniatures to decorate our little coastal vignette.